How to Clean an RC Car After Mud Without Ruining the Electronics
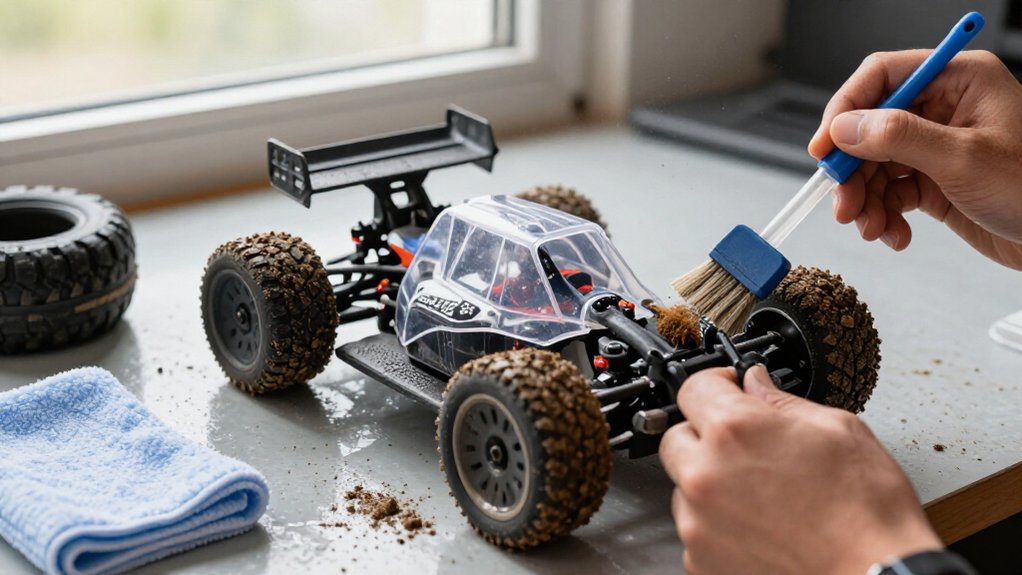
Switch off the car, remove its battery, and keep it disconnected until the vehicle is completely dry.
Brush away loose mud with a soft brush, then use only cleaner approved for waterproof RC vehicles.
If needed, rinse with a controlled, low-pressure stream, keeping water and compressed air away from exposed electronics, connectors, and bearings.
Wipe and air-dry; inspect connectors for moisture or corrosion before reinstalling the battery. The steps below cover wheels, suspension, and maintenance.
Protecting Electronics From Mud
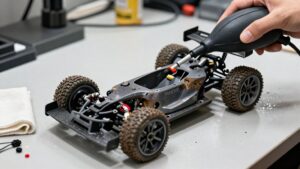
Before cleaning muddy electronics, remove the battery pack to reduce the risk of a short circuit. Keep it disconnected throughout cleaning and drying. Check your RC car’s waterproof rating before applying any all-purpose cleaner; don’t assume sealed components can tolerate liquids. Use compressed air and a soft brush to lift loose mud, wearing eye protection. Work gently around wires, plugs, and electronic components so you don’t force debris into connections or damage insulation.
Never pressure-wash the electronics. If you need to rinse the chassis, use a low-pressure hose and keep water away from vulnerable areas. Dry the vehicle thoroughly with compressed air and a clean rag, paying particular attention to electronics and connections. Reinstall the battery only after everything is completely dry before restarting.
Gathering Mud-Cleaning Supplies
Gather your supplies before you start: compressed air, soft brushes, microfiber cloths or lint-free rags, and a cleaner labeled safe for waterproof RC vehicles.
- Keep eye protection on; compressed air can propel grit toward your face.
- Set out a low-pressure hose for rinsing; avoid pressure washers, which can force water into electronics.
- Have bearing oil and rust inhibitor ready for exposed bearings and metal parts after cleaning.
- Keep small screwdrivers and hex wrenches handy to remove wheels for a thorough clean.
- Use soft brushes to loosen mud from crevices.
Check the cleaner’s label and follow its directions; waterproofing doesn’t mean every product is compatible. Keep tools within reach, and use compressed air cautiously to clear loose debris without directing the nozzle at delicate components. Choose a controlled stream and maintain a safe distance.
Mud-Drying Time Windows
As soon as the muddy run ends, remove the battery and start cleaning before the mud hardens. Treat each stage as a timing window: wet mud cleans away more easily, while hardened deposits demand extra scrubbing. Keep the battery disconnected throughout washing and drying.
| Stage | Action | Check |
|---|---|---|
| Early | Brush with all-purpose cleaner; soak if needed. | Mud remains soft. |
| After rinse | Use low-pressure water, compressed air, then rag. | Surface moisture is gone. |
Air-dry the car in a well-ventilated place; don’t use direct heat, which can warp plastic. Before reassembly or storage, verify that bearings and the motor housing are dry. Reinstall the battery only after you’ve confirmed moisture remains absent. Drying time varies with load, airflow, and humidity, so judge by inspection, not a timer.
Remove Packed Mud From Wheel Hubs
Remove the battery, then take off all four wheels carefully to expose the hubs. Brush packed mud from each hub gradually, using a little all-purpose cleaner for stubborn deposits and keeping pressure off seals and bearings. Rinse at low pressure with electronics protected and tire breather holes covered, then dry the hubs, oil bearings where appropriate, and check that each wheel rotates freely.
Remove Wheels Carefully
Before rinsing, take off all four wheels to expose mud packed around the hubs. Set the car on a stable stand and switch off its power before you work. Use the correctly sized wrench or driver to loosen each wheel nut; a poor fit can round the nut or slip and damage nearby parts.
Remove one wheel at a time, keeping each nut and any washer together in a labeled tray or separate compartment. Note the order and orientation of spacers, if fitted, so you can restore the assembly correctly. Support the wheel as you pull it straight off the axle, and don’t force it against the hub. Repeat for the remaining wheels, then keep the hardware clean and close by for reassembly later.
Loosen Packed Mud
With the wheels off, you can reach mud packed around the hubs. First, remove the battery if you haven’t already. Use a soft brush to loosen dried deposits around each hub and suspension parts. Work gently, keeping bristles clear of seals and wires; don’t push grit toward the bearings.
For stubborn buildup, apply an all-purpose cleaner labeled safe for waterproof RC vehicles. Let it soak briefly, then brush again without scraping or forcing debris inward. Avoid high-pressure water, which can drive grit into bearings. If rinsing is necessary, use a low-pressure hose and keep water controlled.
Wear eye protection while using compressed air to blow away loosened debris. Keep the nozzle at a safe distance, then dry the hubs thoroughly before reinstalling the wheels.
Clean Hub Crevices
Start by removing the battery and each wheel to expose the hub crevices. Brush packed mud from around each hub and axle with a soft brush. Use compressed air to clear loose grit, and wear eye protection. For stubborn deposits, apply a small amount of all-purpose cleaner; let it soak briefly, then scrub again gently.
Don’t force debris inward toward the bearings. Before rinsing, cover wheel breather holes. Use a low-pressure stream and direct water away from exposed electronics. Avoid aiming the spray into openings or driving grit deeper into the hub.
Blow away moisture with compressed air, then wipe the hubs with a lint-free cloth. Check crevices for trapped mud and repeat brushing if needed. Let the surfaces dry before reinstalling the wheels.
Protect Bearings
Once the hubs are clear of surface mud, remove each wheel to reach packed debris before it works into the bearings.
Use a soft brush to loosen mud around each hub. Work gently and keep the bristles from driving grit against bearing seals. Wear eye protection, then use compressed air to lift away loosened debris. Keep the nozzle back and don’t direct a forceful blast into exposed bearings.
If you rinse the hubs, dry them thoroughly with compressed air and a lint-free cloth. Trapped moisture can promote corrosion. Once the exposed bearings are clean and fully dry, apply only a small amount of bearing oil. Too much lubricant can collect dirt and accelerate wear. Wipe away any excess before you reinstall the wheels.
Check Wheel Rotation
After cleaning around the hubs, remove all four wheels to inspect the axle, bearings, and wheel mounts for packed mud.
Use a soft brush to loosen mud around each hub and wheel mount. Keep the bristles clear of sealed bearings; don’t force debris into them or scrape nearby wires. Rinse cleaned hubs with a low-pressure hose, directing water away from exposed electronics.
Blow away moisture with compressed air, then dry the hubs and metal parts. Reinstall each wheel and tighten its fasteners. Spin each wheel by hand.
It should turn freely without rubbing, grinding, or wobbling. If you feel resistance or hear scraping, remove the wheel and check for remaining mud or misalignment. Keep the car powered off during inspection to prevent unexpected motor movement.
Cleaning Mud-Caked Suspension Arms
Remove the battery and wheels before clearing loose mud from the suspension arms. Brush from the top down and around the pivots, taking care not to force debris into sealed bearings. Check that each joint moves freely, and don’t force it if mud remains.
Remove Loose Mud
Take the loose mud off the suspension arms before tackling caked-on dirt. Remove the battery first and set it aside; never direct air at a connected power source. Put on eye protection before using compressed air.
Hold the car securely, then use short, controlled bursts to dislodge loose soil from each arm and nearby crevice. Keep the nozzle moving and aim debris away from the receiver, servo, motor, bearings, and other sensitive parts. Don’t force dirt deeper into joints or gaps with a close jet; maintain a safe distance and moderate pressure.
Work methodically along both sides of the suspension, checking where particles collect around pivots. Once loose mud is gone, inspect the joints and confirm the arms move freely before rinsing or drying.
Brush Suspension Arms
With the battery removed, use a soft brush to loosen mud from the suspension arms, brushing from top to bottom and working dirt out of joints and crevices without pushing it into moving parts. For caked-on mud, apply an all-purpose cleaner labeled safe for waterproof RC vehicles. Let it soak briefly, then scrub the arms again with the soft brush; don’t use a hard tool that could gouge plastic or damage finishes.
Rinse the arms with a low-pressure hose, directing spray away from exposed electronics. Avoid forceful streams, which can drive water and grit into sensitive areas. Blow off water with compressed air, wipe remaining moisture with a cloth, and let the arms dry completely before you reinstall the battery or run the car.
Check Moving Joints
Before checking the moving joints, disconnect the battery and brush loose mud from the suspension arms with a soft brush. Scrub caked mud from the arms and pivots with an all-purpose cleaner approved for waterproof RC vehicles.
Let it soak briefly if residue remains. Move each arm through its travel as you clean, exposing mud around pivots, then rinse with a low-pressure hose.
Wear eye protection and blow water from joints with compressed air. Let the suspension dry completely in a well-ventilated area.
After drying, check that arms move freely and evenly. Apply a small amount of suitable lubricant to metal joints; don’t over-lubricate, because excess can attract grit. Keep the nozzle clear of electronics and avoid reconnecting the battery until everything is dry.
Even Tire Rotation After Cleaning
Once the tires are clean and fully dry, reinstall each wheel in its original position unless you’re rotating them to even out wear.
To promote even tire wear, move each front tire to the rear and each rear tire to the front on the same side. If a tire is directional, keep its rotation arrow pointing forward after moving it; don’t reverse its rolling direction. Match wheel positions carefully so you preserve the correct side and orientation.
Tighten each wheel nut securely, but don’t overtighten it. Before driving, spin every wheel by hand and check for rubbing, binding, or visible wobble. Correct any problem before running the car.
After a short test run, recheck wheel-nut tightness again, since cleaning and refitting can disturb seating.
Battery Swelling or Heat
If you notice a swollen, unusually hot, or damaged battery, don’t charge, use, or reinstall it. Before cleaning mud from your RC car, remove the battery to reduce the risk of an electrical short. Never rinse or spray the battery with water or cleaner; keep it out of the cleaning process.
If the battery feels hot, move it away from flammable materials without handling it more than necessary. Let it cool in a safe, well-ventilated area. Don’t leave it where people may disturb it.
If swelling or excess heat persists, stop using the battery and follow the manufacturer’s guidance for safe disposal. Don’t attempt to repair a swollen pack or return it to service. Keep it separate from the car until you can handle disposal according to those instructions for safe handling.
Connector Corrosion Prevention
With the battery removed, keep rinse water at low pressure and direct it away from connectors and exposed electronics to limit corrosion and electrical damage. Never pressure-wash these areas. After rinsing, clear moisture around each connector with compressed air, then let the car dry completely in a warm, well-ventilated place before reconnecting the battery. Check contacts before every run; don’t power the car until you remove any mud, moisture, or corrosion. Treat any green or white deposits as corrosion, not harmless dirt.
- Keep the battery disconnected while cleaning and drying.
- Aim air gently; avoid forcing debris into housings.
- Use a clean, dry cloth on accessible contacts.
- Replace damaged or heavily corroded connectors before use.
- Store the car cool and dry with the battery removed.
Mud Cleanup Log and Schedule
After each muddy run, remove the battery, note loose or damaged parts, and brush off caked mud before it hardens.
Keep a log for each run. Record packed gears, motor and ESC heatsinks, bearings, and suspension; carefully check each again after cleaning. Note that you rinsed the chassis and wheels with a low-pressure hose and covered wheel breather holes to keep water out.
Before storage, record that you blew off water with compressed air, wiped away remaining moisture, and left the car to dry fully in a warm, ventilated place. Clean promptly after each run; schedule a detailed clean every 5–10 running hours, shortening the interval in heavy mud. Use the log to confirm each step is complete, and note any area that still holds mud or moisture.
Conclusion
After cleaning your RC car, verify that the chassis, wheel hubs, suspension arms, and connectors are fully dry before reconnecting the battery. Check for corrosion, damaged wires, battery swelling, or unusual heat; don’t power up a pack that looks or feels abnormal. Rotate the wheels by hand to confirm they move evenly, then record any issues and your next inspection date. A consistent cleanup routine helps you catch wear early and protect electronics after every muddy run.