RC Car Maintenance Checklist: Before and After Every Run
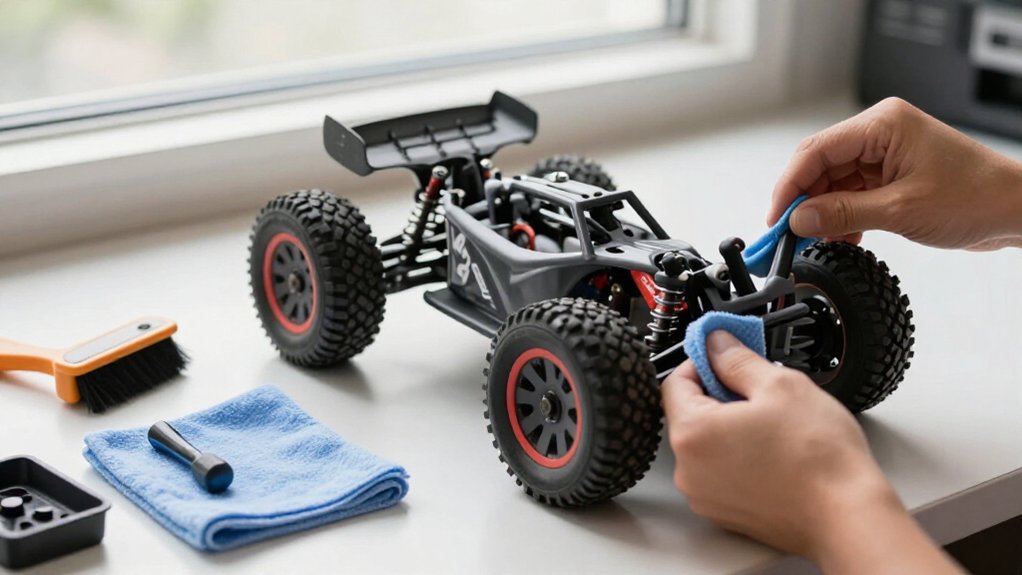
Before each run, power down and disconnect the battery; inspect tires, steering links, suspension arms, wheel nuts, and chassis fasteners.
Check for cracks, looseness, binding, and damaged gear teeth, tightening hardware to manual specifications.
After driving, disconnect the battery, clear debris, inspect the drivetrain, and rotate wheels by hand.
Let the motor, ESC, and battery cool before servicing or charging. Log run time, temperatures, setup, and conditions; the checklist below covers storage and ongoing care.
Post-Run Cooling Period
After a run, switch off your RC car and let the motor, ESC, and battery cool in a ventilated area away from direct sunlight and other heat sources. Keep the vehicle powered down throughout cooldown; don’t begin cleaning or inspection while any component remains warm. Follow your manual’s model-specific cooldown procedure, including any required waiting period.
Once the battery is safe to handle, disconnect or remove it as the manufacturer directs. Before handling or charging the pack, check for unusual heat or odors. If it still feels unusually hot, don’t charge it; allow more time to cool and investigate only when safe.
Wait until the motor, ESC, and battery have reached a safe temperature before touching or servicing them. This pause reduces the risk of burns and prevents you from working around heat-stressed components. Resume the post-run checklist only after the vehicle and battery have cooled fully, as your manual specifies.
Hex Drivers and Threadlock
Before each run, check the chassis screws, suspension-arm fasteners, wheel hexes, and body mounts with a correctly sized hex driver. A snug-fitting tool engages the head fully and helps you avoid stripping it. Tighten loose screws carefully; don’t overtighten fasteners seated in plastic.
- Apply threadlock only to metal-to-metal screw threads, and follow the product and vehicle manuals.
- Keep it off plastic, bearings, and moving components; it can damage parts or interfere with operation.
- Let the compound cure for the label’s stated time before you run the car.
After tightening, verify each fastener remains secure without stressing surrounding material. Use threadlock sparingly and only where specified; then respect the full stated cure interval rather than treating tackiness as readiness.
Battery Storage Intervals
For a short break between runs, disconnect the battery and follow its manufacturer’s instructions on whether it can remain at its current charge. For longer storage, use the maker’s storage-charge procedure; LiPo packs generally need a specified storage state, not a full or empty charge.
| Interval | Action |
|---|---|
| Between runs | Disconnect; follow maker charge guidance. |
| Longer storage | Use chemistry-specific storage charge. |
| Before storage | Cool and inspect; don’t store damaged packs. |
| Charge interval | Check maker’s recommended level and interval. |
| Environment | Approved site; avoid heat, moisture, impacts, combustibles. |
Check your pack’s instructions because storage requirements vary by chemistry and model. Never charge or store a swollen, punctured, crushed, wet, or otherwise damaged battery. If you find damage, keep the pack out of service and follow the manufacturer’s guidance for safe handling and disposal. Use the approved environment for the full storage period, not just the first night. Recheck the instructions before changing your routine or storing the pack for a different length of time.
Inspect Pinion Gear Wear
With the battery disconnected, inspect the pinion teeth for chips, cracks, missing teeth, burrs, and uneven wear. Check that the pinion’s set screw is tight against the motor shaft’s flat, then assess tooth contact and gear mesh for edge wear or binding. Replace a damaged pinion with the specified pitch or module and tooth count, and reset the mesh per your manual.
Inspect Gear Teeth
Inspect the pinion and mating spur gear with the battery disconnected and the pinion gear cover removed. Examine each pinion tooth under good light. Look for chips, cracks, rounded edges, heavy scoring, or metal debris. If you find damage, replace the gear; don’t continue running it, because damaged teeth can worsen and disrupt power transfer.
Check that the pinion sits securely on the motor shaft. Tighten its set screw against the shaft flat, following your model’s manual. After adjustment or replacement, set gear mesh to the manufacturer’s specification. Rotate the drivetrain by hand through complete revolutions. Feel for binding or rough spots; stop and correct the cause before reconnecting the battery. Refit the cover before your next run, and verify the fastener remains secure.
Check for Uneven Wear
Beyond checking for damaged teeth, look for uneven wear on the pinion with the battery disconnected. Inspect each tooth for thinning along one side and for rounded edges or chips. Record wear location and pattern. Check that the pinion sits squarely on the motor shaft, then compare its contact with the spur gear.
If mesh looks tighter on one side, correct the alignment before running again. Inspect the spur gear for matching wear or damage, since it can quickly wear a replacement pinion. Turn the drivetrain gently by hand; stop if you feel rough spots or binding, which may signal inconsistent gear contact. Replace a damaged pinion with the specified tooth count and module or pitch, and set mesh according to your vehicle manual.
Look for Missing Teeth
Switch off the car and disconnect the battery before checking the pinion gear.
Inspect every pinion tooth for chips, cracks, rounded tips, or missing sections. Even one damaged tooth can cause clicking, slipping, or poor power delivery. Turn the drivetrain gently by hand to expose its full circumference; damage may hide on the side facing the spur gear.
Check that the pinion is secure, and consult your model’s manual for fastener specifications. Don’t run the car with a damaged pinion; replace it first. Inspect the spur gear as well, because worn or broken teeth can damage the replacement. After inspection, confirm you’ve checked the entire tooth row, including surfaces that aren’t immediately visible. If you find damage, replace the pinion before your next run.
Assess Gear Mesh
Once the pinion’s teeth look intact, check how the pinion and spur gear mesh. Disconnect the battery before inspecting the pinion. Look for chips, rounded edges, cracks, or uneven wear on the teeth. Confirm the pinion sits firmly on the motor shaft, and tighten its set screw against the shaft’s flat, if present.
Turn the drivetrain by hand and note binding, rough spots, or excessive backlash. These symptoms can point to damaged teeth or incorrect mesh. Inspect contact between the pinion and spur gear through a rotation; it should remain consistent. A mesh that’s too tight can bind, while one that’s too loose can strip teeth. If you find damage, use the manual’s procedure to verify mesh and confirm the pinion’s pitch and tooth count.
Replace Worn Pinions
With the battery disconnected, inspect the pinion teeth for rounded or hooked edges, chips, cracks, and uneven wear. Replace a damaged pinion rather than continuing to run it. Check for metal dust around the pinion and spur gear; it can signal wear or poor gear mesh.
When replacing the pinion, match the tooth count, bore, and gear pitch or module specified for your motor and spur gear. Set mesh to the manufacturer’s specification. Don’t tighten the gears together, since that can cause noise, heat, and rapid wear.
Secure the pinion with the specified set screw and thread-locking method. Keep thread locker away from plastic parts, then recheck the mesh after tightening before your next run.
High-Grip Track Gearing
On high-grip tracks, choose a lower gear ratio with a smaller pinion or larger spur to reduce motor load. After each small change, run a controlled test and check motor and ESC temperatures against the manufacturer’s limits. Inspect the gears after each run, and record the setup and temperatures.
Choose a Lower Gear Ratio
When a high-grip track lets the tyres transmit more torque without slipping, try a lower gear ratio to reduce motor load and heat.
A lower ratio means greater numerical reduction: your motor turns more times for each wheel rotation. You can usually achieve this with a smaller pinion or larger spur gear. Change only one gear step at a time, so you can attribute any handling or drivetrain change to a gear adjustment.
After each change, run a short session under comparable track conditions. Record the pinion and spur tooth counts alongside track conditions to make comparisons reliable. Check gear mesh and component fitment after installation, following your model’s manual. Don’t assume the same tooth-count change suits every chassis or surface; verify compatibility before running.
Monitor Motor Temperature
Monitor motor temperature closely on a high-grip track, where increased traction can raise drivetrain load and heat. Before a run, verify that your pinion and spur gearing suit the motor, ESC, and track conditions. Begin with the manufacturer’s recommended gearing and temperature limit. Make short, controlled runs, then measure the motor between sessions using an infrared thermometer or temperature probe; touch alone can’t establish safety. Stop if the motor reaches or exceeds its specified maximum.
If readings rise quickly, let the motor cool and check for binding, debris, poor mesh, or gearing that’s too tall before resuming. Record ambient conditions, gearing, run duration, and temperature after each session. Use the log to identify overheating trends; adjust gearing one step at a time and repeat tests.
Inspect Gears After Runs
After each high-grip run, disconnect the battery and let the motor and ESC cool before inspecting the drivetrain. Check the accessible pinion, spur, and other exposed gears for chipped or worn teeth. Look for packed dirt or debris that could obstruct rotation, including material lodged between gear teeth.
Turn the drivetrain gently by hand. If you feel binding or roughness, or hear clicking, don’t run the car until you find and correct the cause. High-grip conditions increase drivetrain load, so verify that the gear mesh and mounting fasteners remain secure. Follow your model’s manual for any adjustment; don’t guess at mesh settings.
Remove debris with a soft brush. Apply lubricant only where and as specified in the chassis manual. Keep it off slipper pads and brakes, where contamination can reduce grip or braking performance.
Consistent Run Times
To compare setups or track battery performance, keep run times consistent by timing each session and recording its duration, battery, and driving conditions in a maintenance log. Use the same timer and start/stop points for every test. When comparing configurations, change one variable at a time; differing conditions can obscure results.
Record the surface and relevant weather or track changes. Stop if steering becomes intermittent, the drivetrain binds, or the motor or ESC shows unusual heat. Don’t extend a session to meet a target duration when a fault appears. Let the motor, ESC, and battery cool according to the manufacturer’s operating and cooling guidance before your next run. Clean and inspect the car carefully between sessions so dirt or damage won’t skew your next measurement.
Check for Cracked Suspension Arms
Inspect every suspension arm before and after each run, paying close attention to hinge-pin holes, shock-mounting points, and molded corners where impacts concentrate stress. Brush off dirt, disconnect the battery, and gently flex each arm. Look for hairline splits, white stress marks, spreading gaps, or unusual looseness; don’t force the plastic.
Compare both sides of the car, checking each arm’s shape and movement. A bent or cracked arm can leave a wheel crooked or make the suspension bind, so treat any change as a fault requiring inspection.
Replace a cracked arm before driving; don’t rely on glue, because suspension loads and impacts can make a repair fail suddenly. Fit the correct replacement part, then follow your model’s assembly manual when installing the hinge pin, shock, and fasteners. Recheck the arm’s movement after assembly to confirm it articulates freely without binding. Record the damage carefully before selecting a replacement.
Correcting Loose Wheel Nuts
With the car powered off and the battery disconnected, check each wheel nut for looseness before and after every run. A loose nut can let the wheel shift, affecting control and stressing the hub. Correct it methodically:
- Use the correct wheel wrench and follow the model manual’s torque specification, if provided.
- Keep the wheel seated squarely against the hub as you tighten, preventing binding or uneven seating.
- Stop when secure; overtightening can damage plastic hubs, wheel hexes, or bearings.
If a nut repeatedly loosens or its threads appear damaged, inspect the nut and wheel hardware. Replace faulty parts before driving; don’t rely on extra force or repeated tightening to compensate for damaged threads. Use firm, measured pressure; don’t guess or overtighten. Check alignment again.
Track Maintenance by Run Count
A run-count schedule builds on checking wheel nuts by setting clear inspection points before and after each run and after harsher conditions.
Before every run, check tires, steering links, suspension, wheel nuts, and visible fasteners. Tighten or repair anything loose before driving. After each run, disconnect the battery, remove debris, inspect for damage, and rotate the wheels and drivetrain smoothly by hand.
After wet, muddy, or sandy running, clean exposed gears, drive cups, and bearings. Dry the vehicle fully before storage. After several runs—or sooner after rough use—inspect tire wear, shock leaks, bearings, drivetrain joints, wiring, and cooling parts. Follow your manual’s lubrication and replacement intervals.
Log run conditions, crashes, loose or replaced parts, and service performed. Use those records to identify recurring faults and plan your next inspection.
Conclusion
Treat every run as a maintenance cycle. After driving, let components cool before you inspect them. Check pinion wear, suspension cracks, and wheel nuts; use correctly sized hex drivers and threadlock where specified. Match gearing to track grip, and keep run times consistent so you can spot performance changes. Follow battery maker guidance between uses, especially for longer storage intervals. Record each inspection and run count, then service worn parts before failures interrupt a run.