How to Start a Nitro RC Car: Glow Igniter, Priming and Pull-Start Tips
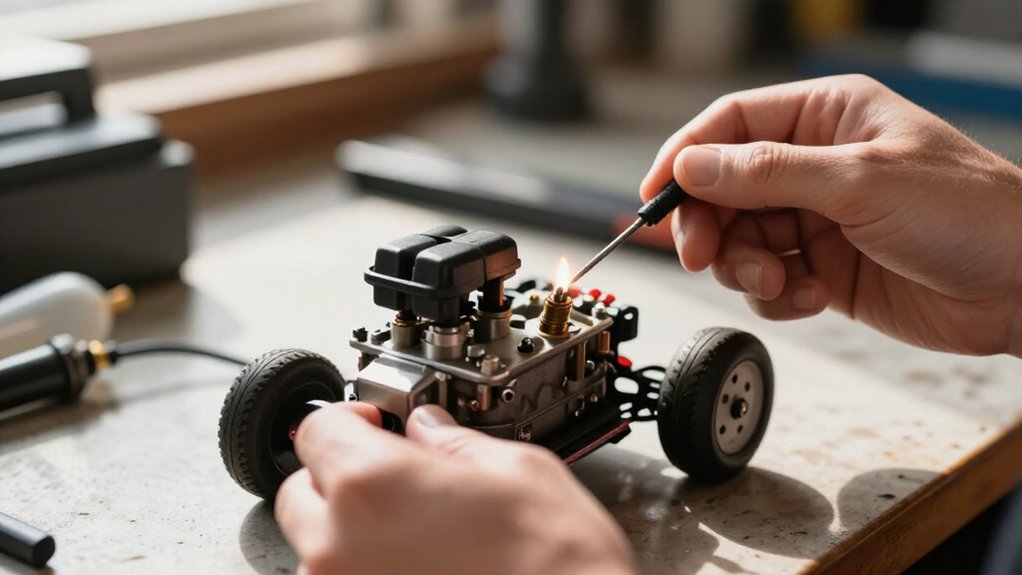
Choose a glow plug heat range and type specified for your engine. Charge the igniter for five hours, then confirm it powers the plug to bright orange.
Place your car on a level stand with wheels clear, fill the tank with 12 to 30% nitro fuel, and switch on the transmitter first. Check throttle return and brakes, prime until fuel reaches the carburettor, then pull smoothly. Keep the filter installed; these checks make starting safer and reliable, with further tips ahead.
Glow Plug Temperature Selection
Select a plug only from the range recommended for your engine and operating conditions; if you lack that information, consult the engine or plug maker’s specifications before changing grades. Temperature labels describe plug heat range, not a target engine temperature.
Use the plug type and verify that it’s in sound condition. To check a suspect plug, connect it to a glow igniter and confirm that the element glows bright orange. If it glows weakly or fails to glow properly, replace it; a weak plug can make starting difficult.
Glow Igniter Battery Check
Before attaching the glow igniter to the plug, charge it for 5 hours and confirm it works. Check its charge and operation before connecting it to the glow plug. When powered, the plug should glow bright orange. If it doesn’t, recharge the igniter or inspect both components.
- Attach the igniter briefly; verify a bright orange glow rather than a dim or absent element.
- If the glow looks weak, recharge the battery before you continue.
- If the engine won’t run, remove the plug and test it directly with the igniter.
- Confirm the removed plug heats and glows bright orange; check it if not.
- Keep the igniter connected during starting if the engine needs help staying lit.
This helps isolate battery and plug faults.
Step 1: Place Car on a Stand
Set the car on a stable RC stand so its wheels clear the surface, and check that the chassis is secure and the stand won’t slide or tip.
Before you pull the starter cord, confirm the stand rests on firm, level ground. Position the car so its wheels and drivetrain clear your hands, tools, and loose clothing. Keep fingers and sleeves clear during starting.
Hold the chassis steady without touching moving parts. Pull the starter cord smoothly in a controlled motion; don’t jerk it or shift the stand. Without a stand, secure the car on firm, level ground before starting. Check that it can’t roll or rock. Keep the chassis supported, and verify all four wheels remain fully clear of the surface before each pull.
Step 2: Fill the Fuel Tank
Fill the tank with fresh model-car fuel containing 12% to 30% nitro, then close the lid fully before priming or starting the engine.
Use a clean bottle and nozzle to fill without spilling fuel onto the chassis or engine. Stop before fuel reaches the filler neck, leaving room to close the lid without forcing fuel into the vent line. Wipe up any spill before proceeding.
Keep fuel in a sealed container away from heat and moisture. Don’t use old or contaminated fuel; it can make the engine difficult to start. Check that the tank holds enough fuel for startup, then press the lid closed and verify that it sits evenly and seals. This prevents leaks while you handle the car and prepare it for operation.
Step 3: Switch On Transmitter First
With the fuel tank sealed, switch on the transmitter before the receiver or engine so you can control the car as soon as it starts. Before you begin, check that the transmitter has fresh or fully charged batteries; weak power can cause delayed or unreliable control. Confirm the selected model matches your car, then test steering and throttle response with the receiver on.
Keep the throttle at idle and hold the car securely while starting the engine. Don’t rely on the throttle trim alone; verify the control operates smoothly and returns to idle. Once the engine starts, use the transmitter to maintain idle and stay ready to stop the engine if the car moves unexpectedly. Remain beside the car and keep the area clear.
Step 4: Prime the Carburetor Before Pulling
After filling the tank with fresh model-car fuel containing 12% to 30% nitro, close the lid fully. Set the throttle fully open, block the exhaust outlet, and pull the starter until fuel reaches the carburetor. Then pull the starter two more times to complete priming, and return the throttle to idle before starting.
Stop as soon as fuel reaches the carburetor; excess fuel can flood the engine and make the pull-start unusually hard. If you’re dealing with a flooded engine, disconnect and plug the fuel line, remove the glow plug, turn the car upside down, and pull the starter a few times to clear excess fuel. Keep priming brief and controlled: you need fuel at the carburetor, not a charged cylinder. Once priming is complete, start.
Step 5: Tune the Idle-Speed Screw
Once the engine is warm, make sure the throttle returns fully to idle, then adjust the idle-speed screw in small increments. Let the engine settle before judging its setting; a cold engine can mislead you. Aim for a steady idle that keeps the engine running without engaging the clutch.
If the car creeps forward, turn the screw slightly to lower idle speed. If the engine stalls, turn it slightly to raise speed. Pause after each change and listen for a stable idle before making another adjustment.
Keep the throttle control released and confirm the linkage returns to its idle position each time. Change only the idle-speed screw for this task. Don’t alter the high- or low-speed needle settings to correct an idle problem; those needles control mixture across other throttle ranges. Make small changes, then reassess before you resume operation and check the idle again.
Step 6: Wipe Fuel From Chassis
Before starting the engine, wipe spilled nitro fuel from the chassis with a clean, absorbent cloth. Work systematically around the fuel tank, fuel lines, carburettor, and exhaust; these areas commonly trap droplets and residue after priming or refueling. Blot rather than spread wet fuel, and use a clean section of cloth as it becomes saturated.
Check seams, fittings, and nearby chassis surfaces, then dry the chassis completely before starting. Keep the cloth and any liquid away from the glow plug and electrical components to prevent contamination or damage. Wipe residue promptly. Place fuel-soaked cloths in a suitable, safe disposal container; don’t leave them beside the model or near heat. After cleanup, wash your hands thoroughly with soap and water before handling other equipment.
Confirm Throttle Response
With the transmitter on, move the throttle trigger and confirm the carburettor slide or barrel travels smoothly from idle to open. Release the trigger and check that the carburettor returns fully to its idle position. Pull the trigger back and verify that the brakes engage. Correct any binding or incomplete return before starting; throttle response and braking must remain predictable.
Keep the trigger at idle while you prime the engine. Open the throttle only during priming, then return it to idle before starting. If the engine needs a little throttle to fire, use gentle trigger input rather than holding it wide open. After it fires, let it idle for about 30 seconds before you apply full throttle for predictable control during startup.
Check Pull-Start Cord Tension
After confirming the throttle and brake operate correctly, pull the starter cord smoothly and steadily to engage the one-way bearing and turn the engine over. Watch its resistance; stop if it feels unusually hard, since a flooded engine may need excess fuel cleared before another attempt.
If the cord slips or fails to turn the engine, check whether the pull-start mechanism and one-way bearing engage correctly. Let the cord retract fully after each pull; releasing it abruptly can strain the recoil mechanism. If it won’t retract or feels loose, inspect the recoil spring and starter assembly before using the starter again.
| Symptom | Check | Action |
|---|---|---|
| Hard pull | Engine may be flooded | Clear excess fuel |
| Cord slips | Bearing engagement | Check starter |
| Loose cord | Recoil spring | Inspect assembly |
Resume only when corrected.
Clean the Air Filter
Clean the air filter regularly to prevent dirt buildup from restricting airflow to the nitro engine.
Always remove the filter carefully before cleaning; keep loose dirt away from the carburettor opening. Wash the foam element with filter cleaner or mild soapy water. Rinse it thoroughly if you use soap, then let it dry completely before oiling. Apply a small amount of air-filter oil evenly across the dry foam, working it through the material without leaving dry patches.
Reinstall the element securely and check that its seal sits flat against the housing. Don’t run the engine with the filter removed, damaged, or poorly seated; unfiltered air can carry abrasive particles into the engine. Before each start, inspect the filter for tears and confirm it’s oiled and fitted correctly. Check its fit carefully before you start the engine.
Conclusion
Before each run, choose a glow plug temperature suited to your engine and verify the igniter is charged. Place the car on a stand, fill the tank, and switch on your transmitter first.
Wipe spilled fuel, confirm throttle response, and check pull-start cord tension. Clean the air filter. Prime only as your engine manufacturer directs; don’t flood it. Pull smoothly, keep hands clear, and stop if starting feels abnormal. These checks help protect your engine.