How to Break In a Nitro RC Engine the Right Way
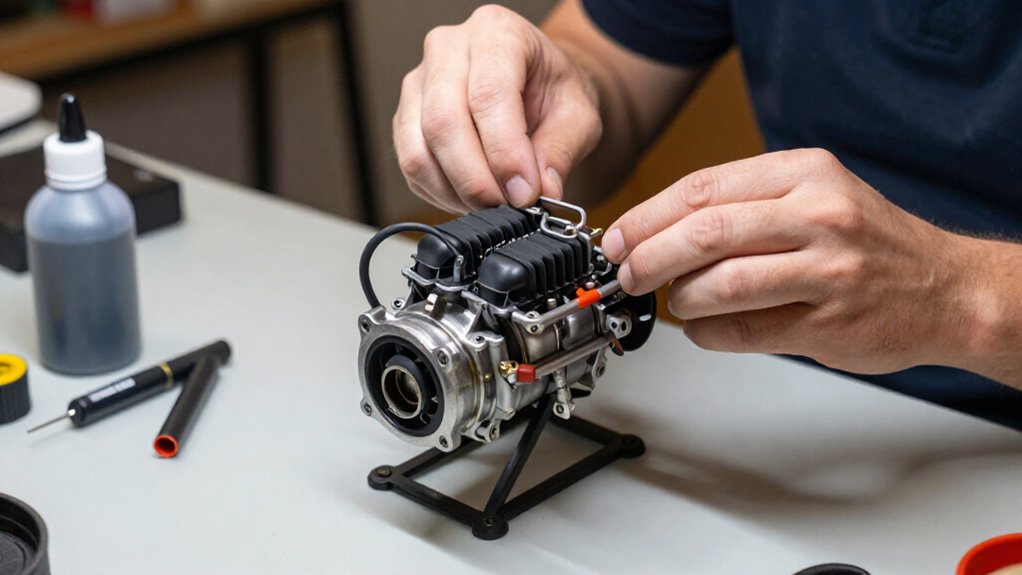
To break in a nitro RC engine correctly, clear the pit area and preheat the crankcase and head to 200 to 250°F. Set the carburetor needles to the manufacturer’s baseline, then run the first tank rich at low throttle, keeping wheels down and a smoke trail.
Monitor temperature; stop if smoke disappears or the engine overheats, and let it cool.
Drain fuel safely, verify consistent idle, then apply after-run oil before storage. The steps below cover further checks.
Expected Engine Performance
Once your nitro engine reaches operating temperature, it should idle consistently, shift smoothly into acceleration, and run without stalling. You should expect performance to improve gradually over the first tanks as the piston-and-sleeve fit beds in. Don’t judge peak power during initial rich, low-stress runs; those settings protect parts while contact surfaces settle.
After break-in, tune for strong, clean acceleration and a reliable idle. Make small high-speed-needle adjustments, then assess response and engine temperature; don’t chase one temperature target. Under load, retain a visible smoke trail as a check against an excessively lean mixture.
Watch for steady power, excessive smoke loss, lean surging, or overheating, and correct the tune if symptoms appear. Break-in alone can’t guarantee specific horsepower or top speed. Your result also depends on the engine, fuel, tuning, gearing, and vehicle setup, so compare results only under consistent conditions.
Preheat the Engine Before Running
Before starting a cold nitro engine, preheat it to about 200 to 250°F (93 to 121°C), unless the manufacturer specifies a different range. Use a heat gun or purpose-made engine warmer, sweeping it slowly across the crankcase and cylinder head for even warming. Keep the heat focused on the engine; don’t aim it at the fuel tank, carburetor, or nearby plastic and rubber components. Measure temperature with an infrared thermometer at the glow-plug area, checking frequently so you don’t overshoot the target.
- That controlled warmth lets the piston and sleeve expand before ignition, reducing startup tightness and wear.
- You’ll protect close-fitting parts instead of forcing a cold engine through its first runs.
- Take your time: even heat now can spare you costly damage later and promote smoother starts.
Step 1: Clear the Pit Table
With the engine preheated, clear a flat, stable pit table so the model can’t tip while you work. Remove fuel bottles, tools, loose screws, and other clutter from the engine area, especially near rotating parts. A clear perimeter prevents objects from catching in moving components or interfering with your hands during inspection and setup.
Keep paper towels and cleaning supplies within reach, but position them well away from the exhaust and every hot surface. Arrange only the break-in essentials—fuel, a glow igniter, and a temperature gauge—on the table, with each item easy to grasp without crossing over the engine.
Keep bystanders and pets clear while the model runs; accidental contact can disturb your work or easily expose them to hot parts.
Step 2: Set the Carburetor to Factory Defaults
Set the carburetor’s high-speed, low-speed, and idle-stop needles to the engine maker’s documented factory settings before break-in. Find those settings in your engine’s manual; needle positions vary, so don’t assume a universal number of turns. If the engine’s been used, return each adjustable needle to that documented baseline before making adjustments.
Count needle adjustments from gently seated only when the manufacturer directs you to do so. Don’t force a needle against its seat; overtightening can damage the needle or carburetor and undermine accurate adjustment. Follow the manual’s procedure and record the baseline positions so you can verify each setting.
Set the idle-stop screw to maintain the small carburetor opening specified for rest. This opening lets the engine idle while keeping the clutch disengaged. Check the throttle linkage and confirm the opening remains consistent when you release the control. Use the maker’s guidance rather than changing needle positions by guesswork. This establishes a repeatable starting configuration for the engine. Before proceeding, inspect the carburetor for free needle movement and confirm the throttle returns reliably to the established idle opening without binding during linkage checks.
Step 3: Run the First Rich Tank
Once the carburetor is at its factory break-in settings, fill the tank with the fuel the engine manufacturer recommends and start the engine.
Keep the first tank deliberately rich so the engine runs cool and produces a steady trail of visible smoke. Don’t lean the high-speed needle to improve performance. Use low throttle in short, varied bursts; don’t hold one speed.
Keep the wheels on the ground and avoid full-throttle runs. Monitor engine temperature throughout the tank and follow the manufacturer’s break-in temperature guidance. Use an appropriate temperature measurement method. Stop if the engine gets too hot or the smoke trail disappears. After the tank ends, let the engine cool completely. Then check for loose fasteners and fuel leaks before you continue the break-in.
Step 4: Maintain Steady Quarter Throttle
During early break-in runs, hold the throttle near one-quarter open and use smooth, steady inputs. Keep the engine rich and don’t exceed quarter throttle until the manufacturer’s instructions say it’s ready. Use short, controlled runs, then let the engine cool between them.
As it warms and runs, maintain the same gentle throttle level; avoid sudden acceleration that loads the engine.
In a safe open area or on the track, vary your vehicle’s path while holding near quarter throttle. This changes engine speed and prevents operation at one speed. Make each run consistent so you can monitor behavior without demanding more power. If the engine surges, stalls, or runs unusually hot, stop the vehicle and check the tune instead of opening the throttle further.
Step 5: Inspect Glow Plug Condition
After the engine cools, remove the glow plug and inspect its coil for damage, uneven winding, heavy deposits, or distortion.
Use a charged glow igniter to test the coil. It should glow bright orange across its full length. If you see a dark section, uneven glow, or no glow, replace the plug; it may be faulty. Look for a crushed or misshapen coil, too. That damage can mean the piston has contacted it, pointing to an engine-clearance problem rather than ordinary plug wear.
Inspect the sealing washer and threads for damage. Confirm the plug seats snugly, but don’t overtighten it. Use the plug type your engine maker recommends; its heat range and construction support reliable starting and running during break-in for consistent engine operation.
Step 6: Drain Leftover Fuel
Drain the fuel tank after each break-in session to prevent old nitro fuel from sitting in the system.
Use the engine’s fuel line to draw remaining fuel from the tank, or remove the fuel cap and pour the contents into an approved container. Work over a surface, and keep the container ready before opening the tank. If fuel remains in the carburetor line, disconnect the line and drain it into the same approved container.
Seal the container and label it clearly. Store drained nitro fuel away from heat, sparks, and children. Don’t leave it in an open cup or near equipment that may ignite vapors. Never pour leftover fuel onto the ground or down a drain. Follow local rules for fuel storage and disposal.
Verify Idle Holds Consistently
Once the engine is fully warm, set the carburetor’s idle gap to the manufacturer’s specification, often about 1 mm, and confirm the throttle linkage returns the slide to the same opening at neutral.
Let the engine idle for 10 to 15 seconds and observe its speed. A consistent setting produces a steady, repeatable idle without gradually racing. Apply and release the brake several times while the engine runs. After each application, the idle should return to the same speed, without dipping or surging.
If the speed changes after braking, inspect the linkage and carburetor slide for binding. Check that the return spring closes the slide reliably. Don’t keep turning the idle-stop screw to mask inconsistent results; first verify the linkage, fuel lines, and engine temperature are stable under test.
Engine Stalls at Idle
Engine Stalls at Idle
If your nitro engine stalls at idle, first determine whether its idle speed is too low or the low-speed mixture is incorrect. Warm the engine before adjusting, follow the maker’s baseline, and change one setting at a time. Raise the idle-stop screw slightly if the barrel closes too far. If it dies when you remove the glow starter, inspect the plug and fully charge the igniter.
Use symptoms to guide mixture changes:
| Symptom | Likely cause | Adjustment |
|---|---|---|
| Hot, lean running | Low-speed needle too lean | Richen 1/8 turn; retest |
| Thick smoke, sluggish response | Low-speed setting too rich | Lean gradually; retest |
| Stall at low throttle | Idle speed too low | Raise stop screw slightly |
Retest after each small change; avoid altering both settings together, and keep the engine within its break-in baseline.
Oil Engine Before Storage
Before storage, protect your nitro engine’s internal parts with after-run oil. Remove the air filter and glow plug, then place a few drops of after-run oil made for nitro engines into the carburetor and glow-plug openings. Turn the flywheel by hand several times to distribute oil across the piston, sleeve, and bearings. Don’t substitute motor oil or penetrating sprays; they may not provide suitable protection for these internal parts.
When oiling is complete, reinstall the glow plug and cover the carburetor opening to limit moisture and dust during storage. Keep the engine upright while you work, and rotate the flywheel slowly so the oil reaches the moving surfaces. Finish by checking that both openings are sealed before you put the model away for storage.
Conclusion
Follow the manufacturer’s break-in sequence rather than chasing power. Preheat the engine, clear your pit table, and return the carburetor to its factory settings before you run the first rich tank. Drain leftover fuel, then verify that the idle holds consistently as temperatures stabilize.
If the engine stalls at idle, correct the tune gradually and recheck. After running, oil the engine before storage. You’ll protect internal parts and establish a reliable baseline for later tuning.