How to Paint a Lexan RC Body for a Pro-Looking Finish
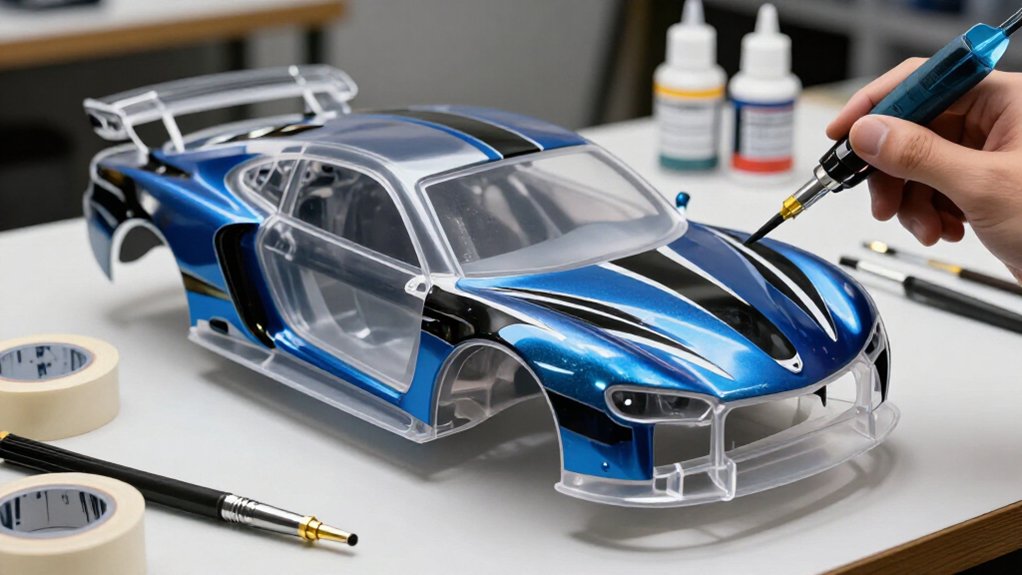
You’ll get a clean finish with polycarbonate paint; test each color and backing coat on scrap.
Wash the shell with mild soap and lukewarm water, dry it, then wipe with isopropyl alcohol. Keep the protective film on, mask window frames carefully, and spray thin interior coats, letting each dry.
Trim molded lines after painting. Peel masks slowly and inspect coverage in daylight. Continue for tips on fixing peeling and storing your body safely outdoors.
Masking Window Frames
Before masking the window frames, keep the body’s exterior protective film in place.
Wash the Lexan body with mild soap and water. Dry it, then wipe it with isopropyl alcohol and a lint-free cloth. Let the surface dry before applying any mask.
For clear windows, apply liquid mask in an even layer and let it dry completely. Use a sharp hobby knife to cut carefully along each window-frame line; keep the blade on the line and avoid cutting into the body.
If you prefer tape, use quality masking tape. Align it with the frame edges, then press every edge down firmly to reduce paint bleed.
Spray the frame color in thin, even coats. When painting’s complete, remove the mask carefully. Check coverage before removing it.
Lexan Paint Compatibility Checks
Once the masks are in place, check that your paint is made for polycarbonate or Lexan. Choose a compatible formula such as Tamiya PS paints; these are designed to flex with the shell and help prevent peeling or flaking. Don’t assume ordinary spray paint will bond properly to a flexible body.
Before coating the shell, test the paint on its extra Lexan scrap. Apply it as directed and check the result for adhesion and finish before committing paint to your shell. For a multicolor scheme, verify every product separately, including the backing coat. Use this checklist:
- Check label: polycarbonate or Lexan.
- Choose Tamiya PS or equivalent.
- Avoid unverified ordinary spray paint.
- Test paint on spare Lexan scrap.
- Verify each color and backing coat.
Step 1: Wash Lexan With Soap
After confirming your paint is compatible with Lexan, wash the body with mild soap and water to remove manufacturing oils and residue.
Keep the exterior protective film in place throughout washing; it shields the outer surface while you prepare the shell. Use clean, lukewarm water and a small amount of mild soap. Wet the body, then gently wipe its paint side with your fingers or a soft, clean cloth, working over the entire surface without scrubbing aggressively. Rinse thoroughly until no soap remains, since detergent residue can interfere with paint adhesion.
Shake off excess water and dry the body with a clean, lint-free cloth. Next, dampen a lint-free microfiber cloth with isopropyl alcohol and wipe the surface evenly. Let it evaporate completely before painting. Handle the cleaned body by its edges to avoid transferring oils from your fingers back onto the paint surface for best adhesion.
Step 2: Trim the Lexan Shell
Keep the exterior protective film on while you trim the Lexan shell to protect it from scratches. Trim the shell only after you’ve completed painting, following its molded trim lines for a clean fit. Use sharp hobby scissors or Lexan body scissors to cut the flexible material without cracking it.
For tight curves and mounting openings, work gradually with a hobby knife; don’t force a large cut. Remove small amounts at a time, keeping the blade controlled and aligned with the molded edge. After trimming, place the body on the chassis before mounting it. Check that each wheel arch clears its tire through the steering range, and confirm the shell edges don’t contact chassis components. If you find interference, adjust the affected edge carefully.
Step 3: Apply Thin Color Coats
Use paint formulated for polycarbonate, such as Tamiya PS spray paint, and apply it to the inside of the shell with the exterior protective film still in place. Before spraying, check the shell’s clean and dry.
Shake the can thoroughly, then test the spray on scrap polycarbonate. Hold the nozzle at the label-recommended distance and keep the can moving across the panel. Apply a light pass, overlapping strokes slightly without lingering at edges or corners. Let each coat dry completely before adding another. Build coverage with several thin, even coats; a heavy application can run or pool. Since you’re painting from inside, apply light colors before darker ones so the outside shows them correctly. Inspect coverage between coats under good light, and don’t rush drying time for consistent, smooth color coverage.
Step 4: Back With White Paint
Once you’ve removed the masks, apply white polycarbonate paint to the inside of the body as a backing coat; it’ll make the colors beneath appear brighter and more vibrant.
Check that earlier color coats are dry before you begin. Shake the paint can as directed. Spray a light, even pass from a consistent distance, moving the nozzle continuously and overlapping each pass slightly.
Don’t aim for full coverage at once; a heavy coat may obscure details or dry unevenly. Let the coat dry according to the label, then inspect coverage under good light. Apply another thin coat, allowing it to dry before adding more. Repeat until the white backing appears uniform. Let the final coat dry fully before carefully handling or installing the body.
Step 5: Add Metallic Flake Accents
Before adding the white backing coat, apply metallic accents to the inside of the Lexan body so they show through the shell. Choose a polycarbonate-compatible metallic paint, such as Tamiya PS, to guarantee it bonds to the shell. Test the color on scrap Lexan first; the backing shade can change how the flakes appear. White generally keeps colors bright, while silver or black shifts their look.
Next, carefully mask the accent shapes with quality tape or liquid mask that’s fully dry. Press every edge down firmly to limit paint bleed. Spray several thin, even coats of metallic paint inside, allowing each coat to dry before applying the next. Avoid one heavy coat, which can obscure detail or create uneven coverage on each accent area.
Step 6: Peel Masking Film Carefully
After the paint layers and backing coat are fully dry, slowly peel away the interior masking, keeping the exterior protective film in place until the paintwork is complete. Begin at an accessible corner and lift the film with your fingernail or a plastic pick; don’t use a metal blade against the body. Pull it back slowly at a low angle, supporting the shell with your other hand. Around sharp edges and intricate shapes, reduce tension and work in short sections so the paint line stays crisp.
If you used liquid mask, trace each design boundary with a hobby knife before lifting it, taking care not to score the Lexan. Remove all interior masking only after the backing coat has dried, and keep the exterior film on throughout this step. If paint has bled beneath an edge, consider making the mark part of the design instead of scraping the flexible Lexan body.
Inspect Color Under Daylight
With the interior masking removed and each coat fully dry, hold the body up to natural daylight while keeping the exterior protective film in place.
Indoor lighting can make paint look warmer, cooler, or less vivid than it appears outdoors, so don’t judge color under shop lamps. Turn the shell slowly and inspect it from several angles; metallic finishes can shift as reflected light changes. Compare the body with a scrap Lexan piece sprayed in the same coats and backed with the same color, such as white, silver, or black. Check the hue, intensity, and coverage side by side in daylight. If the result looks different from the sample, verify that both received matching coats and backing colors before deciding whether to adjust.
Paint Peeling at Edges
If paint starts peeling at the edges, check surface prep, paint type, and application before adding more color. First, wash the inside with mild soap and water, then wipe it with isopropyl alcohol and a lint-free cloth. This removes residue that can weaken adhesion.
Use polycarbonate-specific paint, such as Tamiya PS; regular spray paint may peel or flake from Lexan. Press quality masking tape firmly along each edge to block paint creep. Apply several thin, even coats, allowing each to dry completely before the next. Heavy coats can lift or pool. Keep the exterior protective film on during painting and remove it only when the paintwork is complete.
| Check | Likely cause |
|---|---|
| Prep | Residue |
| Paint | Wrong formula |
| Tape | Loose edge |
| Coats | Too heavy or wet |
If an edge lifts, let the coat dry, then clean, mask, and repaint that area in thin, even layers.
Avoid Direct-Sun Storage
Store your painted Lexan body in a cool, shaded indoor spot, not in a sunlit car or near a window. After each run, remove the shell and let it dry completely before storage. Wipe away moisture with a soft, clean cloth; don’t trap dampness under a cover.
Choose a shelf away from windows, because prolonged UV exposure can fade paint and weaken its finish. Keep the shell out of a garage window’s sunbeam, where heat can accelerate finish deterioration. Once it’s dry, cover the shell so dust can’t settle on the paint and gear can’t scratch it. Don’t stack tools or other bodies on top.
Move the shell if sunlight reaches its storage area. Check periodically, especially in warm weather, and keep the shell protected indoors.
Conclusion
Mask the window frames, confirm your paint is compatible with Lexan, and wash the shell with soap before painting. Trim the body first, then apply several thin color coats rather than one heavy coat. Let the paint dry before carefully peeling off the masking film. Check the finish in daylight and touch up missed areas.
If paint lifts at the edges, clean and remask those spots before recoating. Store your finished shell out of direct sunlight to help preserve its color and prevent heat damage.