What Paint to Use on an RC Body? Polycarbonate Paints Compared
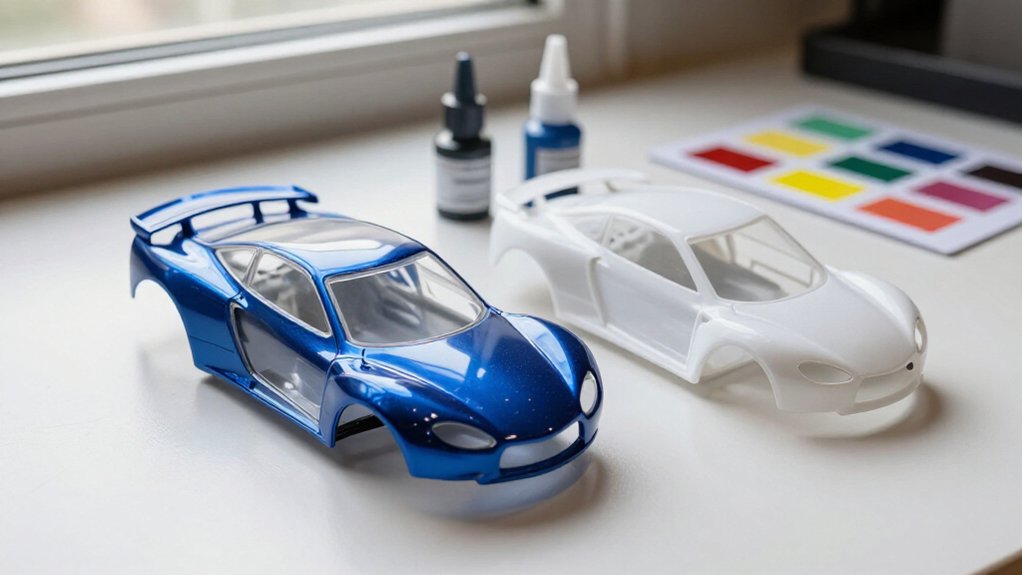
For a polycarbonate RC body, choose paint labeled for Lexan, such as Tamiya PS; apply it inside the shell so the finish survives impacts and flex.
In comparisons, PS aerosols adhered and covered evenly, while Tamiya PC and Humbrol sprays varied by color; automotive paint may not bond reliably.
Apply light coats, letting each dry, and back light colors with white or silver. Use TS paints on ABS or polystyrene accessories. The details ahead help prevent failures.
Paint Choice by Shell Color
For a transparent polycarbonate shell, use flexible Tamiya PS paint; conventional automotive paint won’t adhere well. Since you paint the shell from the inside, apply darker colors first and the lightest color last. This order prevents darker coats from obscuring lighter colors.
Plan extra coats for white and other light shades, which often lack opacity in a single pass. Add a white or silver backing coat to strengthen coverage and keep the color even. For black plastic add-on parts, prime the surface before applying a lighter color. Tamiya TS-101 Base White can provide a bright foundation and help that color cover. If you want a matte shell, apply its color and any decals intended to look matte, then spray thin coats of Tamiya PS-55.
Masking Windows Before Spraying
Once you’ve chosen your paint, mask the windows before spraying. Apply each window mask inside the polycarbonate shell, aligning it with outlines marked outside. If you’re using wet-applied masks, let them dry for a couple of days before painting. For replacements, cut self-adhesive vinyl from templates; don’t reverse them before printing.
| Task | Method |
|---|---|
| Position | Match inside masks to exterior outlines |
| Seal | Use quality tape to limit bleed |
| Wait | Dry wet-applied masks for days |
| Remove | Keep window masks; lift corner carefully |
After paint cures, remove colour masks while leaving window masks in place. Lift a window-mask corner with a craft knife, then peel it back at a very shallow angle. Work slowly around each edge to avoid tearing the mask or scratching the shell.
Polycarbonate Paint Adhesion Test
Because polycarbonate bodies need paint that bonds reliably to their inside surface, compare adhesion and coverage before choosing a finish.
Apply each product as directed to a masked scrap-shell area and let it cure fully. Check for lifted edges, scratches, or thin patches under bright, direct light. In this comparison, TAMIYA PS aerosols delivered the strongest adhesion and most even coverage. TAMIYA PC paints adhered and covered unevenly, often needing several coats from different angles.
Humbrol Hobby Spray results depended on color: white performed very well, black fairly, blue indifferently, and orange poorly. Give Humbrol acrylics ample curing time; handling the shell too soon can make paint debond. Brushed Parma Faskolor showed little pigment, while airbrushing might improve coverage; no adhesion result was reported.
Tamiya PS Paint Range
Tamiya PS sprays are formulated for polycarbonate RC bodies, with flexible, fuel- and oil-resistant adhesion; each can holds 100 ml. Choose from the PS color range, then spray the body’s inside from 25 to 30 cm away in several thin coats, applying dark colors first and waiting 30 to 60 minutes between coats. Add white or silver backing for opacity, or use PS-55 for a matte finish after removing the film and masking the windows from the outside.
PS Paint Basics
Choose Tamiya PS sprays for transparent polycarbonate (Lexan) RC bodies: they flex with the shell and resist oil and fuel. Apply PS paint to the inside of the shell; this keeps the finish protected during use. For multicolour designs, spray dark colours first, then lighter colours.
Before painting, bring the can to room temperature, shake it well, and test the spray on scrap. Hold the can about 25 to 30 cm away and apply several thin coats. Allow each coat to dry for 30 to 60 minutes before adding the next.
Add up to three coats if needed, then apply white or silver backing coats to improve opacity.
Don’t use PS paint on polystyrene or ABS add-on parts such as mirrors and spoilers; use Tamiya TS paints instead.
Color Range
Once you’ve chosen paint suited to a polycarbonate shell, you can select from Tamiya PS sprays’ wide range of colors.
Each 100 ml can gives you a fixed quantity for planning a single-color or multicolor scheme. Use the table to compare key buying details. That helps you match quantity to body size and design complexity.
| Planning point | Practical detail | Use |
|---|---|---|
| Compatibility | Polycarbonate (Lexan) | RC bodies |
| Can size | 100 ml | Estimate supply |
| Color count | See listing | Check current listings |
For multicolor designs, apply darker PS colors first and the lightest last. To improve opacity, add three to four coats of white or silver backing where needed.
Application And Finish
For an even finish, spray Tamiya PS paint on the inside of the polycarbonate body, applying darker colors before lighter ones. Shake a room-temperature can thoroughly, then test the color on scrap polycarbonate before painting your body. Hold the nozzle about 25 to 30 cm away and apply several thin coats, moving steadily to avoid heavy spots.
Let each coat dry for 30 to 60 minutes; lighter colors may need up to three extra coats. Where opacity matters, back the color with three or four coats of white or silver.
For a matte exterior, remove the protective film, mask windows and lights, and spray PS-55 in thin coats. Wait 30 to 60 minutes between coats, and keep masking in place until the finish is dry before you handle the body.
Shell Thickness and Flex
Shell thickness affects how much your polycarbonate body flexes under impact. Choose flexible PS paint that can move with the shell, since conventional automotive paint may not adhere reliably. Apply several thin coats inside the body to help the finish flex without cracking.
Shell Thickness Basics
A polycarbonate RC body flexes on impact, so use paint that can flex with it, such as Tamiya PS, rather than conventional automotive paint, which may not adhere properly.
Shell thickness affects how readily your body bends: a thinner panel generally deflects more, while a thicker panel resists bending. Don’t assume thickness eliminates flex; choose a coating for polycarbonate. Apply several light coats instead of one heavy layer, which can leave a weighty, uneven finish.
For Tamiya PC, spray from different angles and build coverage gradually. Let every coat cure fully before you flex, fit, or run the shell. Use this checklist to match the process to the body:
| Panel | Practical note |
|---|---|
| Thin | More deflection |
| Thick | Less bending |
| Any | Thin coats |
Flex And Paint Adhesion
Because a polycarbonate body flexes on impact, use flexible Tamiya PS paint made for Lexan shells; conventional automotive paint may not adhere reliably. Paint the shell from inside, where the coating stays protected as the body bends. Tamiya PS aerosols showed the best adhesion and coverage in the comparison; Tamiya PC paints had uneven results.
Let each coat cure fully before you run the vehicle, or poor bonding may let paint debond during flex. Follow label directions for curing times and check coverage before installation. This placement shields the coating from abrasion and handling, reducing damage during ordinary use and maintenance.
Matching Paint To Flex
As the body flexes in use, match it with flexible Tamiya PS paint formulated for polycarbonate; shell thickness alone doesn’t call for a different paint type.
Choose paint for the material, not a presumed thickness requirement: Tamiya PS sprays are designed for Lexan-style shells and can accommodate movement. Conventional automotive paint may not adhere to polycarbonate and can separate as you flex the body. Apply several thin coats instead of one heavy layer. Thin passes build coverage while limiting added weight and uneven buildup.
Let each coat cure fully before you install or run the shell; handling it too soon can weaken the bond, and flexing may contribute to debonding. Follow the product’s application and curing directions, and inspect coverage before adding another light pass.
Silver-Backing Fluorescent Paint
For a more vivid finish, spray fluorescent polycarbonate paint on the inside of the shell, then apply silver backing coats to reflect light through the color. Keep each coat thin and let it dry for 30 to 60 minutes before spraying the next; add up to three or four silver coats when coverage needs it.
| Step | Practical guide |
|---|---|
| Color | Apply fluorescent paint first |
| Drying | Wait 30 to 60 minutes |
| Backing | Build thin silver coats |
| Coverage | Use up to four coats |
Traxxas lists ProGraphix fluorescent blue, pink, purple, and red sprays in 5 oz cans at $9.99 each. Inspect the exterior as you add backing, and stop once the fluorescent color looks evenly bright across the shell. Use only the coats needed for uniform coverage without hiding the vivid color.
Solvent Compatibility With Polycarbonate
Which paint belongs on a polycarbonate RC shell? Choose a coating engineered for polycarbonate, such as Tamiya PS spray paint. Its formulation bonds to flexible Lexan-style bodies and tolerates impacts, oil, and fuel. Conventional automotive paints may fail to adhere reliably, so don’t treat a body shell like a metal panel.
Keep Tamiya TS paints for polystyrene or ABS accessories, including mirrors and spoilers; don’t use them on the polycarbonate shell. If you need to thin PS paint, use only a branded thinner specifically for polycarbonate paint. Don’t substitute an unverified solvent: compatibility depends on the paint system, and an unsuitable solvent can compromise the coating or body. No alternative thinner or mixing recipe is established, so follow the product label and avoid improvised blends.
Spraying Coats Too Heavily
To prevent runs and uneven coverage, spray polycarbonate paint in several thin coats rather than one heavy coat.
Keep the can about 25 to 30 cm (10 to 12 in) from the shell, and move it steadily in one direction. Let each coat dry 30 to 60 minutes before adding another. Change spray direction between coats: cover the body lengthwise, then across it, to reduce missed areas and build even color. Apply up to three additional color coats if needed, then back the color with white or silver for opacity. This sequence builds opacity without flooding the shell or obscuring fine body details.
- Start each pass just before the shell’s edge.
- Overlap passes slightly for consistent coverage.
- Keep your wrist and can moving throughout each pass.
- Avoid stopping over one spot, where paint can pool.
- Inspect coverage after each coat before continuing.
Warm Spray Cans Before Use
Even with light, overlapping coats, cold paint can spray unevenly. Bring the can to room temperature before painting to help it spray consistently. Don’t heat it directly or place it near a flame. Shake it well, then test the color on cardboard or paper. Check the color and coverage before spraying the RC body.
Work outdoors when possible, or choose a well-ventilated area, and wear a breathing mask.
| Step | Action |
|---|---|
| Prepare | Room-temperature can |
| Test | Shake; spray cardboard |
Keep the can upright and spray overlapping passes at the labeled distance. If it sputters, stop and check its temperature; don’t move closer to compensate. Let coats dry fully. Warming improves delivery, but doesn’t replace ventilation or a mask.
Conclusion
Choose paint made for polycarbonate so you get a finish that flexes with your shell. Match the color to your backing plan; fluorescent shades may need silver backing. Mask windows before spraying, and test adhesion on scrap.
Use compatible solvents, follow Tamiya PS directions, and apply several light coats rather than one heavy coat. Warm cans safely, not with direct heat. Check shell thickness and flex before choosing a paint system. You’ll get durable results.