How to Tune a Nitro RC Engine: High-Speed and Low-Speed Needles
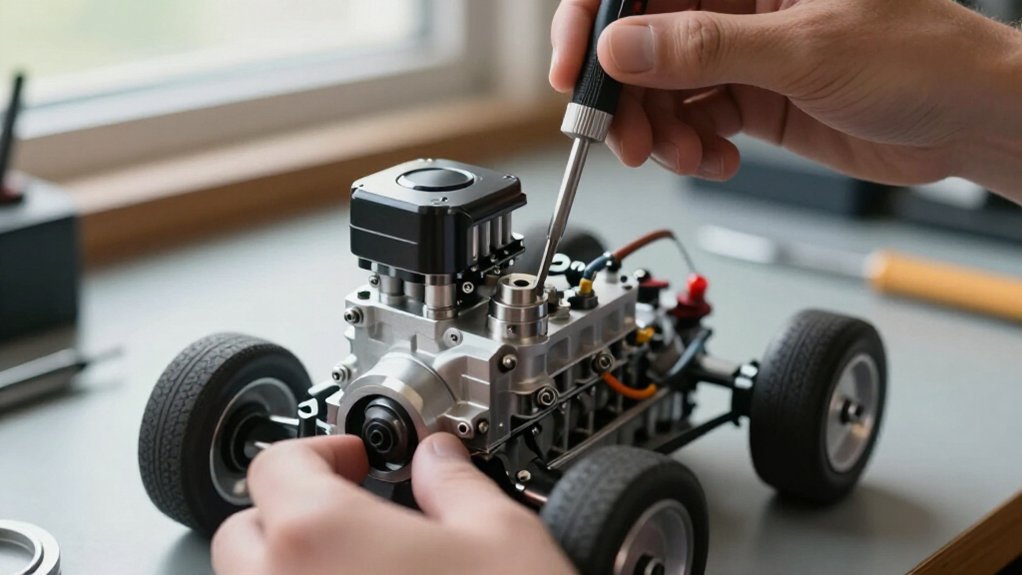
Check fuel, glow plug, and a clean, sealed air filter. Secure the car on a stand with wheels clear, then warm the engine.
Tune the high-speed needle first, making 1/16-turn changes and testing full-throttle passes; keep visible smoke and avoid overheating.
Next, set the low-speed needle using idle response and the fuel-line pinch test; seek a rev and stall in 2–4 seconds.
Set idle last, wipe residue, and use the steps below to refine your tune.
High- and Low-Speed Needles
The high-speed needle (HSN) controls fuel flow at full throttle, while the low-speed needle (LSN) controls delivery at idle and low RPM. Tune the HSN first: warm the engine, then make adjustments of about 1/16 turn. After each change, make several full-throttle passes.
Lean the HSN only while performance improves. If improvement stops or the engine shows signs of a lean mixture, richen the needle slightly. Verify that the engine stays cool and produces some smoke.
After setting HSN, tune the LSN. Idle 10 seconds, then apply full throttle. Sluggish acceleration with heavy smoke indicates a rich low-speed mixture. Adjust LSN in small increments. Aim for crisp acceleration and a brief rev-up before the engine stalls in a pinch test, roughly 2 to 4 seconds, depending on engine guidance.
Fuel, Glow Plug, Starter
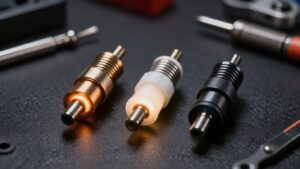
Before tuning, shake the fuel and keep it sealed away from air and sunlight; don’t pour leftover fuel back into the jug. If you change fuel brands, let the engine idle, then run half to one tank rich before fine-tuning. Inspect the glow plug after the change: new oils or detergents can loosen deposits and foul its coil.
- Look for a shiny, round coil; it indicates healthy operation.
- Treat a distorted or broken wire as a warning of lean running and possible engine damage.
- If performance seems wrong, install a new plug before making major needle adjustments.
- Use your starter to crank the engine; don’t compensate for a weak start by altering mixture settings.
Check the plug condition first, then resume tuning.
Step 1: Position RC Car on Stand
Once the glow plug checks out, secure the RC car on a stable stand with all wheels clear of the ground. This prevents forward movement during checks. Position the chassis so you can reach the carburetor’s high-speed and low-speed needles without leaning over the wheels or drivetrain.
Before starting the engine or applying throttle, test the stand’s stability. It mustn’t tip, shift, or slide under vibration or engine torque; reposition it on a surface if needed. Keep your hands, loose clothing, and tools clear of spinning wheels, gears, and shafts whenever the engine runs. For any tuning check that requires full-throttle passes, take the car off the stand and use a safe, open area. Never make those passes while the car remains elevated.
Step 2: Warm Engine Before Tuning
Run the engine until it reaches normal operating temperature before adjusting either the high-speed or low-speed needle; make final tuning decisions only under those conditions.
For track tuning, warm the whole vehicle. Start about three to four minutes before your qualifier, then run hard for two to three minutes. This brings the engine, clutch, and chassis into working condition together. After changing fuel brands, idle for a few minutes, then run half to one tank rich before fine-tuning.
Recheck your tune after major weather or track-condition changes; temperature, humidity, and altitude affect engine response. Don’t assume yesterday’s settings remain suitable. Wait for stable operating conditions, then make small needle changes and verify each adjustment with the car running under the same track conditions again.
Step 3: Pinch-Test the Fuel Line
Warm the engine and set the high-speed needle first, then use the fuel-line pinch test to assess the low-speed mixture.
At idle, pinch the fuel line close to the carburetor and watch the engine as fuel flow stops. A brief rise in rpm followed by a stall in two to four seconds generally indicates a suitable low-speed mixture, though timing varies by engine and tuning guidance. A long delay before stalling, with sustained high revs, suggests a rich setting. An immediate stall with little or no rev-up suggests a lean setting.
Adjust the low-speed needle only in small increments, following the engine’s adjustment procedure. Repeat the pinch test after each change, allowing the engine to idle before you judge its response. Once the mixture is close, check that acceleration is crisp and produces a brief puff of smoke. Make one change at a time.
Step 4: Perform a High-Speed Pass
With the engine warm, make several full-throttle passes before adjusting the high-speed needle so you can assess its baseline performance. Use the same clear, level stretch and hold the throttle fully open long enough to judge acceleration, top speed, and response. Note whether the engine reaches peak speed quickly and maintains steady power. Watch the exhaust at wide-open throttle; visible bluish or whitish smoke confirms fuel is still reaching the engine.
After each high-speed needle adjustment, make several more passes under the same conditions and compare results with your baseline. Continue leaning only while speed or power improves. If gains stop or performance worsens, richen the setting slightly. Check temperature with a gauge if available, but use it alongside performance and smoke. Excessive heat or little smoke can signal an overly lean setting.
Step 5: Make Quarter-Turn Needle Changes
Although the title refers to quarter-turn changes, don’t turn a needle that far at once: start with 1/16-turn adjustments and don’t exceed about 1/8 turn per step. A quarter-turn is substantial; if you need that much correction, divide it into smaller steps and test the engine after each one. Before turning either needle, note its starting position and direction of rotation, so you can restore the setting if performance worsens.
For the high-speed needle, make one small change, then run several full-throttle passes under consistent conditions. Compare acceleration, top speed, and engine response before deciding whether another adjustment is needed. Tune the low-speed needle more cautiously; it’s more sensitive. Make a tiny change, then repeat the idle-and-acceleration test. Keep other settings unchanged during testing.
Step 6: Wipe Fuel Residue
After tuning, wipe fuel residue from the engine and nearby surfaces with a clean cloth to keep the area clean and make leaks easier to spot. Let hot parts cool enough to handle, then wipe the crankcase, cooling head exterior, carburetor body, and chassis around the engine. Use light strokes; don’t scrub debris toward the carburetor throat, air intake, fuel lines, or other openings.
Keep the cloth away from exposed intake passages, and replace it if it collects grit. Check the air filter for dirt or fuel contamination, since either can restrict or alter airflow and affect your tuning session. Clean or replace the filter according to its design. Wipe spills promptly, and store your fuel container separately, away from sunlight and the ground.
Verify a Steady Idle
Warm the engine and drivetrain to operating temperature before checking idle, since final adjustments made cold may not hold under normal running conditions. With the throttle released, use the idle screw to keep the engine running steadily while the carburetor opening remains small enough to prevent the vehicle from moving. Rev the warmed engine, release the throttle, and watch how quickly the idle returns. A fast idle that takes several seconds to drop can indicate a rich low-speed mixture.
If idle surges, fluctuates, or cuts out when you apply throttle, check the low-speed mixture and idle opening; don’t open the throttle further to mask the problem. Make small low-speed changes, recheck operation, then adjust the idle screw last to set the final steady speed.
Lean-Run Overheating
If the high-speed needle is set too lean, the engine can lose lubrication, overheat, and suffer premature wear or damage. Watch for a high-pitched note, little smoke, or temperature that keeps climbing. At full throttle, your engine may struggle to gain RPM, sputter, cut out, or stall.
Lean the high-speed needle only about 1/16 turn at a time. Make several full-throttle passes after each adjustment, and stop when performance stops improving.
| Sign | Response |
|---|---|
| Warning signs | Little smoke |
| Adjustment | Richen slightly |
| Gauge reading | Guide only |
Richen the needle slightly if symptoms appear. Aim for visible smoke at wide-open throttle; use a temperature gauge as a guide, not your only test. Above 300°F usually signals overheating, though some engines typically run around 210 to 230°F; limits vary with changing conditions.
Inspect the Air Filter
Before adjusting the needles, inspect the air filter: dirt or blockage restricts airflow and can skew the engine’s mixture and performance. A restricted filter can make the engine behave as though its carburetor settings are wrong, so needle changes may lead you away from the correct baseline.
Clean the filter regularly according to its type and condition; don’t tune with accumulated dust or oil obstructing the element. Check that the filter fits securely and seals the carburetor intake completely. A loose or damaged seal lets unfiltered dust enter the engine, risking wear and inconsistent operation.
After running in dusty conditions, inspect the filter again. Clean it or replace it if it’s dirty, damaged, or no longer seals properly. You can then tune the needles.
Conclusion
Once you’ve adjusted both needles, let the engine reach operating temperature before judging throttle response. Keep the car on a stand, use fresh fuel and a suitable glow plug, and start with a starter. Apply the pinch test cautiously, then wipe away fuel residue. If the engine surges or runs hot, richen the mixture and retest. Don’t lean it excessively.
Finally, inspect and clean the air filter regularly; maintenance helps protect performance and engine life.