How to Set Up an RC Car for Speed Runs: Gearing, Aero and Tires
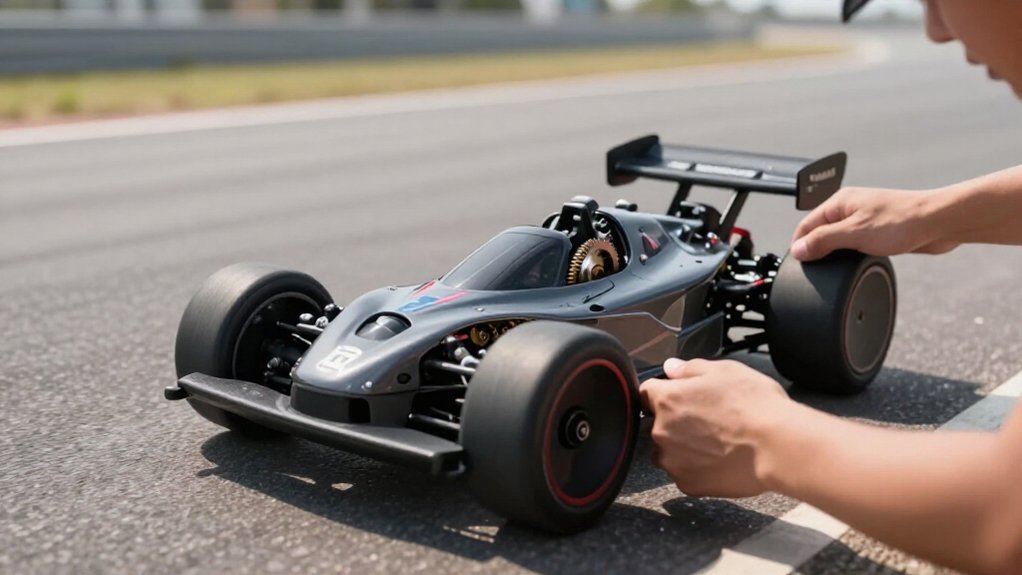
Choose a level course with start and finish points, a braking zone, and surface conditions. Start with manufacturer-approved gearing, then add one or two pinion teeth if GPS shows continued acceleration and motor/ESC temperatures remain within limits.
Use balanced, firmly glued, speed-rated tires; inspect for ballooning after short runs.
Begin at the recommended wing angle, reducing it while stability holds. Check wheel nuts, gear mesh, and bearing drag; you’ll find further setup guidance below.
Target Speed-Run Setup
Start with conservative gearing, then increase the pinion by one or two teeth at a time; larger pinions raise speed potential but load the motor and ESC more heavily. Use GPS data to determine whether your car continues accelerating at the end of each measured pass. Check motor and ESC temperatures after every gearing change; rising heat signals excessive load. If acceleration fades or temperatures climb quickly, reduce gearing before another run.
Gear up only when the car stays cool and continues accelerating through the full measured distance. Before a full-speed pass, verify that your setup tracks straight and remains planted under power. Run in a large, clear area, well away from people, traffic, animals, and obstacles. Don’t stack changes; isolate each result.
Inspect Tires for Ballooning
Once gearing keeps the motor and ESC within safe temperatures, inspect the tires after each short speed run.
At high RPM, soft tires can balloon, enlarging their effective diameter. That change makes your gearing taller, strains the motor, and can blunt acceleration. Check each wheel before you increase gearing or attempt a faster pass:
- Look for sidewall bulges, uneven growth, cracks, or tread separation from the wheel.
- Confirm the tire is firmly glued, balanced, and suited to your pavement and target speed.
- Choose speed-rated belted tires, such as ARRMA dBoots Hoons, to limit expansion and improve tracking.
If you detect ballooning or instability, stop and correct the tire setup before running again. A stable tire keeps power delivery predictable and reduces load on the drivetrain.
Step 1: Measure the Speed-Run Course
Choose a long, straight, level stretch with enough room for the car to accelerate and slow down safely. Measure and mark the same start and finish points for every pass. These fixed points let you compare GPS speed and acceleration data consistently.
Inspect the surface for loose gravel, bumps, road crown, and hazards that can reduce traction or make your car wander at speed. Keep the course and runoff clear of people, traffic, animals, and obstacles. Confirm the marked distance suits your measurement method, and leave a clear braking zone beyond the finish; don’t stop the car abruptly or turn around within the measured lane at speed. Record surface conditions and travel direction, then repeat tests on the same stretch to make comparisons meaningful.
Step 2: Set Baseline Gearing
Before chasing top speed, set a conservative, manufacturer-approved gear ratio the car can pull reliably for a full pass.
A larger pinion or smaller spur makes gearing taller, raising top-speed potential while reducing acceleration and increasing motor and ESC workload. A smaller pinion or larger spur does the opposite. Change gearing in small steps, often just one or two pinion teeth, and test on the same road with the same battery, tires, and body.
After each short pass, check motor and ESC temperatures, voltage sag, and GPS data. Rising heat or fading acceleration suggests your gearing is too tall. Gear up slightly only when temperatures stay safely within manufacturer limits and GPS shows the car still accelerates at the end of the measured run.
Step 3: Set Wing Angle
Set the wing to the manufacturer’s recommended angle, then make small adjustments and test each one on the same surface. More angle generally adds downforce, helping your car stay planted, but it also increases aerodynamic drag and can cut top speed. Less angle reduces drag, yet too little downforce can let the car wander, destabilize, or lift at speed.
Adjust the wing only after your car tracks reliably; wandering may instead come from tire growth, ride height, toe, or road crown. Change one setting at a time, then compare GPS speed and stability. Aim for the least wing angle that keeps your car controlled, not simply the lowest-drag setting. If stability worsens, restore the prior angle before testing another change.
Step 4: Set ESC Timing Carefully
Because ESC timing affects motor RPM, power, and heat, tune it as part of your gearing setup, not in isolation. Added timing can raise workload and heat, so don’t increase pinion size immediately afterward. Treat timing and gearing as a linked system: more electrical advance may deliver higher RPM, but it can push the motor and ESC closer to their thermal limits.
Change timing or gearing one step at a time, then repeat a pass under comparable conditions. This lets you isolate each adjustment’s effect on acceleration, speed, and heat instead of confusing several changes. After every run, compare motor and ESC temperatures with their manufacturers’ limits, and assess whether acceleration stays strong through the finish. If heat rises quickly, lower timing or use shorter gearing before attempting a faster configuration.
Step 5: Log GPS Speed and Motor Temperature
Once timing and gearing are set, log GPS speed and motor temperature on every pass to judge both performance and load.
Record peak speed and check whether your car still accelerates at the end of the measured distance. Log motor temperature immediately after each run; use the same measurement method and note the elapsed time since the pass.
Pair each reading with gearing, battery condition, tires, and other setup changes. Repeat runs on the same road under similar conditions, changing one variable at a time so you can isolate its effect on speed and heat.
If temperature climbs quickly or GPS data shows acceleration fading before the finish, reduce gearing or address excess load. Use this log to guide your next adjustment.
Step 6: Tighten Wheel Nuts
Secure each wheel nut before a speed run to prevent a wheel from loosening or coming off at high speed. Use the correct nut and wrench size for your car; seat each nut fully against the wheel. Afterward, rotate the wheel by hand. It should turn freely without rubbing or binding, since contact can add drag and compromise a clean pass.
Tighten firmly, but don’t overtighten: excessive force can damage threads or stress wheel components. Follow your vehicle’s manual for the installation procedure and any specified locking method; don’t substitute an improvised fastener or locking approach. Recheck every nut after short test passes, especially after you’ve changed wheels or tires. A brief inspection between runs helps you catch movement before you apply full power again.
Inspect Spur Gear Wear
Before a speed run, inspect the spur gear for rounded, chipped, cracked, or missing teeth; any damage can cause slipping or inconsistent power delivery.
Check the circumference for uneven wear across the teeth; this points to poor gear mesh or a drivetrain that isn’t running straight. Turn the drivetrain by hand and watch the spur rotate. Feel for tight spots and look for mesh changes through each revolution, since either can expose alignment problems before they cost speed or damage gears.
Replace a damaged spur before running, and match its gear module and tooth pitch to the pinion. After installation, set pinion-to-spur mesh correctly. Verify that both gears rotate freely without binding. Consistent backlash helps prevent tooth loading while keeping drive transfer efficient.
Steering Wobble at Speed
If your RC car develops steering wobble at speed, treat it as a stability issue rather than a gearing problem; taller gearing can make an unstable car harder to control.
Check tire balance, glue, and wheel condition; an unbalanced or shifting tire can disturb tracking as speed rises. Inspect left-to-right alignment, tire consistency, suspension stiffness, and weight distribution so the chassis tracks straight. Tire ballooning can destabilize your car; speed-rated belted tires limit growth at high RPM.
| Symptom | Check |
|---|---|
| Wobble | Balance, glue, wheel |
| Wander | Ride height, toe, wing angle, road crown |
Change one variable at a time; test safely, confirm straight tracking, then make faster passes. Measured setup changes preserve balance and reveal the cause. Adjust ride height and toe only as needed.
Inspect Bearings for Drag
How freely do your wheels spin? Before a speed run, lift your car and turn each wheel by hand. You should feel smooth, low-resistance rotation, with no scraping, roughness, or excessive drag. Check wheel and drivetrain bearings for binding, dirt, damage, and worn seals; any of these can waste power.
Inspect bearings alongside the drivetrain and gear mesh. Resistance anywhere in the rotating system can add heat, reducing efficiency. If a bearing feels rough or binds, clean or replace it, then spin the wheels to confirm free rotation before changing gearing. Recheck bearing drag after maintenance and after runs. Low mechanical resistance helps your motor and ESC deliver power efficiently, so a gearing change won’t mask a fault or push a strained system harder.
Conclusion
Before each run, verify your tires, course, gearing, wing angle, wheel nuts, spur gear, steering, and bearings. You’ll get reliable speed only when the car stays planted, tracks straight, and spins freely. Change one setting at a time, then record GPS speed and conditions so you can identify gains. If tires balloon or wobble appears, stop and correct it before accelerating again. A repeatable setup beats a risky pass, and gives you a safer run.