How to Make an RC Car Faster: Gearing, Batteries and Motor Upgrades
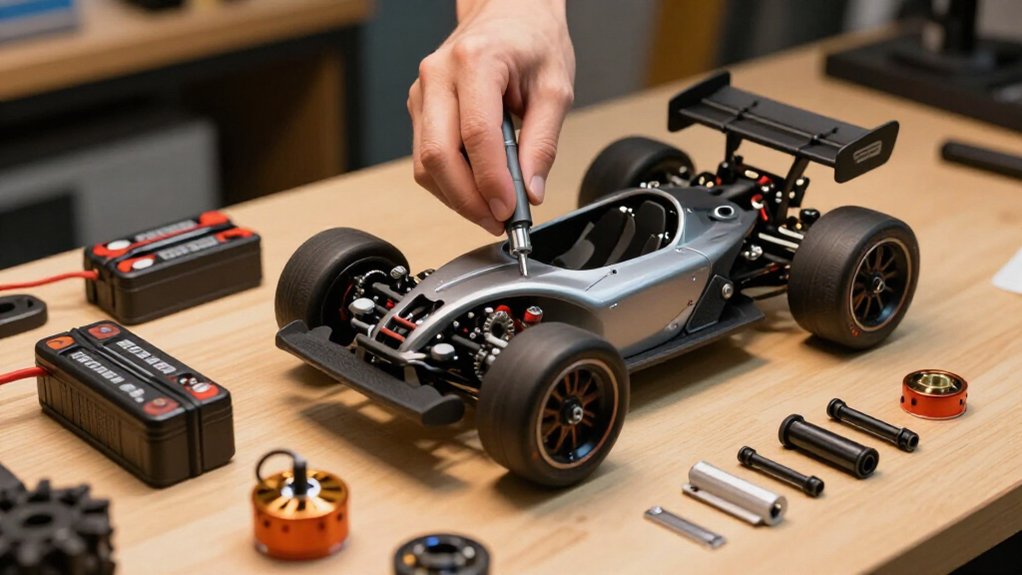
You can make your RC car faster with a larger pinion, smaller spur, compatible motor upgrade, or higher-voltage battery.
Check ESC and motor limits first: 3S adds voltage and heat. Set gear mesh correctly, confirm the drivetrain turns freely, then test briefly on flat ground.
Check temperatures and keep the motor below 80°C.
Log GPS speed, gearing, and battery setup; careful comparisons will help you spot useful gains without sacrificing reliability over repeated runs.
Speed Gains and Heat Limits
To raise top speed, install a pinion with one or two more teeth, or use a smaller spur, but expect more workload and heat from the motor and ESC. Make changes in small steps, then assess acceleration and run time as well as peak speed; taller gearing can make the car slower off the line if the motor can’t pull it efficiently. Start with smooth, hard, flat surfaces, where a taller ratio is easier to sustain, rather than rough terrain that adds resistance.
After a two- to three-minute test, check temperatures and back down if they climb excessively. Keep the motor below 80°C. Heat also rises with binding or oversized tires; verify your wheels and drivetrain spin freely.
Check Motor and ESC Limits
Before fitting a higher-voltage battery, check your ESC manual for its maximum cell count and voltage; exceeding either limit can destroy the ESC immediately. Match the motor, ESC, battery voltage, current demand, and gearing to your vehicle’s specifications, not merely a connector that fits. A VXL-3s ESC, for example, accepts 2S (7.4 V) or 3S (11.1 V) LiPo packs; never assume it supports more.
- Raise voltage or gearing gradually; both increase motor and ESC workload.
- Run briefly, then check temperatures against each manufacturer’s limits; limits vary by system.
- Inspect the battery and connectors after each performance run.
- Stop if temperatures approach limits, voltage sags, or connectors show damage.
These checks protect hardware while letting you tune for speed without guessing or risking an avoidable failure.
Step 1: Remove the Body Shell
Remove the body shell before inspecting the chassis to reach the motor, ESC, battery, and drivetrain.
With the shell off, you can check whether the battery sits and every connector and wire stays secure under acceleration. Loose leads can interrupt power or contact moving parts, while poorly routed wiring may restrict airflow. Inspect the motor and ESC cooling areas; clear debris and make sure nothing blocks ventilation, since excess heat can reduce output and shorten component life.
Removing the shell also gives you room to inspect gear mesh and turn the drivetrain by hand. Look for binding or uneven resistance before changing setup, and correct mechanical problems that waste power. When checks are complete, refit the shell and confirm it doesn’t press on wires or obstruct cooling airflow. Secure fasteners, then verify that the chassis remains ready for an unrestricted run.
Step 2: Measure Tire Diameter
Measure each mounted, inflated tire’s outside diameter across the tread, passing through the wheel’s center. Use a ruler or calipers, and record the result in millimeters so your gearing and speed calculations stay consistent. A 100 mm tire measures 10 cm across.
Measure tires while they’re mounted and inflated; foam compression and tire shape affect the rolling diameter, so an off-car measurement may mislead you. Check all four tires, since uneven wear or mismatched sizes can create different rolling speeds and compromise handling.
After every tire change, measure and record the diameter. A larger tire travels farther with each revolution, effectively making your gearing taller. That can alter acceleration and load, so use the measured diameter when evaluating speed changes and selecting a setup.
Step 3: Swap Bushings for Bearings
Swap brass or plastic bushings in the hubs, steering arms, and transmission for precision ball bearings to reduce rotational friction and drivetrain drag. Bearings let wheels and gears spin freely, so your motor can reach higher RPM with less wasted energy. You’ll improve rolling efficiency, and this may extend runtime.
For a car with plastic hub bushings, sealed steel bearings are a practical budget upgrade, typically costing about $15 to $25. Match each bearing’s dimensions to your chassis and drivetrain before ordering; an incorrect fit can cause binding or excess play. Choose rubber shields if you run in dusty or wet off-road conditions. For cleaner tarmac, metal-shielded or ceramic bearings suit the environment. An Atrek set of eight 5×10×4 mm metal-shielded bearings is listed at $27.98.
Step 4: Install a Higher-Cell Lipo
Bearings reduce drivetrain drag, but a higher-cell LiPo can raise your RC car’s speed by supplying more voltage. A 3S pack delivers 11.1 volts nominal, 50% above a 2S pack’s 7.4 volts, increasing motor speed. That gain raises demands, so check compatibility.
Read your ESC manual to confirm it supports the cell count; a plug doesn’t prove the voltage is safe. Verify the motor, battery dimensions, connectors, and gearing suit the higher-voltage setup. Enable the ESC’s LiPo low-voltage cutoff to help protect cells, and follow the battery maker’s charging and use instructions.
Start with short runs, then check motor and ESC temperatures. Higher voltage can build heat and stress the drivetrain. If temperatures climb, stop and reassess gearing or reduce run time.
Step 5: Choose Low-Resistance Tires
Choose tires that match the surface: slick or semi-slick tread usually rolls more efficiently on asphalt, concrete, and packed dirt than soft off-road knobbies.
Lower rolling resistance cuts energy lost to tread flex, while suitable traction limits wheelspin, so your motor’s output reaches the ground more effectively. Don’t choose the slickest option automatically; select a compound and tread that grip your running surface. Excessive spin wastes power and slows acceleration.
For runs above 60 km/h, consider belted tires: internal fibre reinforcement resists ballooning, which can reduce the contact patch and destabilise the car. Before a speed run, check tire diameter, balance, and glue security. A mismatched diameter or uneven, loose tire can cause vibration, inconsistent handling, and wasted power at speed under full throttle.
Step 6: Check the Pinion Grub Screw
After selecting tires that put power down efficiently, check that the pinion grub screw is tight against the flat on the motor shaft; if it slips, the pinion can lose drive and waste power. Use a correctly sized hex driver to protect the screw head from stripping, and don’t overtighten it; firm contact is enough.
If your pinion has two grub screws, position one directly over the shaft flat, then tighten both securely. For a metal-to-metal screw, apply a small drop of thread-locking compound to resist vibration and reduce the chance of loosening during hard acceleration. After tightening, rotate the drivetrain by hand. Confirm the pinion remains aligned with the spur gear and meshes cleanly through a full rotation before you run the car.
Record GPS Top Speed
To measure your RC car’s real-world speed, use a GPS speed meter or phone app, and secure the device so it can’t shift during a run. Choose a large, flat, clear surface, then accelerate smoothly in a straight line. A gradual launch limits wheelspin, helping the GPS capture a useful peak rather than a brief tire-spin spike.
Make several passes in both directions and compare readings to account for wind, slope, and GPS variation. Check the peak-speed reading after each run, and stop if the car becomes unstable. Log battery cell count, gearing, tires, and motor with every result so you can compare upgrades fairly. Repeat the same route and test method to make small gains easier to verify across repeated speed tests consistently.
ESC Thermal Cutoff
If your ESC triggers its thermal cutoff, it’s limiting or shutting down power to protect its electronics from overheating. Taller gearing, higher-voltage batteries, heavy loads, and repeated full-throttle runs can push temperatures past safe limits.
| Condition | Practical response |
|---|---|
| Cutoff occurs | Stop; let the ESC cool |
| ESC feels hot | Check airflow and temperature |
| Drivetrain binds | Check free movement before driving |
| Cutoff repeats | Reduce pinion size; restore approved gearing |
After a cutoff, wait until the unit cools fully, then confirm airflow and free drivetrain movement before another run. Verify motor, battery voltage, and ESC compatibility, and match your battery’s cell count to the manual. Check the manufacturer’s temperature limits; never bypass thermal protection. You’ll protect electronics and sustain speed by correcting the load, not overriding the safeguard.
Inspect Gear Mesh Regularly
Inspect the gear mesh whenever you change the pinion or motor, because poor alignment adds drivetrain resistance and heat.
Set the pinion against the spur so the teeth engage fully without binding. Rotate the gears by hand; you’ll confirm that the drivetrain moves freely. If the mesh feels tight, adjust the motor position to reduce friction and motor workload. A loose mesh can let the teeth strike poorly and damage the gears, so don’t trade efficiency for excessive clearance.
Follow your vehicle’s manual or model-specific mesh instructions, since the correct setting varies by chassis. After adjustment, secure the motor screws and run the car. Then listen for unusual noise, check for heat, and inspect the teeth for wear. If you spot problems, recheck the mesh.
Conclusion
To make your RC car faster, chase measurable gains without exceeding its limits. Check your motor and ESC ratings, remove the shell for testing, and measure tire diameter before changing gearing. Swap bushings for bearings, secure the pinion grub screw, and inspect gear mesh regularly.
Record GPS top speed after each adjustment, then monitor temperatures; an ESC thermal cutoff signals excess heat. You’ll gain speed by tuning one variable at a time and protecting your electronics.