How to Calibrate an RC ESC to Your Transmitter
Remove the propellers before connecting the battery or testing motors. Check your ESC’s manual to confirm calibration support; many DShot, CAN, and opto ESCs don’t need endpoint calibration.
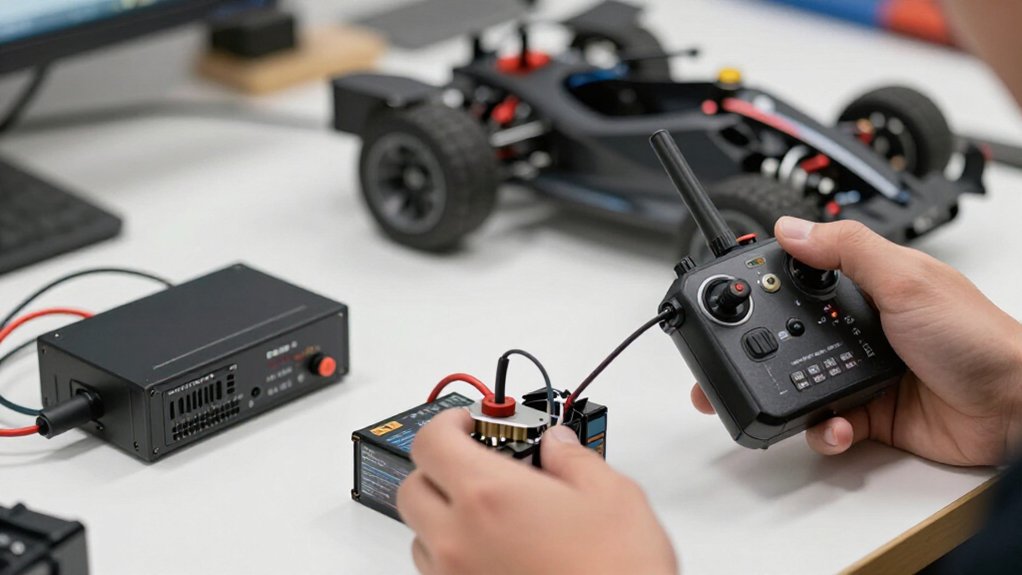
For PWM ESCs, power your transmitter, set throttle to maximum, then connect the battery and follow the tone prompts. When the ESC captures maximum, move throttle to minimum and wait for confirmation.
Verify endpoints and motor response with props removed. You’ll find method-specific checks and troubleshooting below.
ESC Calibration Methods
Before calibrating, remove the propellers and check the ESC documentation; DJI Opto, DShot, and CAN ESCs generally don’t require endpoint calibration.
For all-at-once calibration, disconnect USB and the battery, set your transmitter throttle to maximum, then reconnect the battery. Follow the ESC’s tone prompts. When it signals that it has captured maximum throttle, move the stick to minimum; the completion tone confirms that it’s recorded the lower endpoint.
For manual calibration, connect one ESC to your receiver’s throttle channel. Calibrate it at maximum throttle, then minimum throttle, and repeat the sequence for each ESC.
On supported ArduPilot systems, set `ESC_CALIBRATION` to 3 for semi-automatic calibration. Disconnect USB and the battery, reconnect power, and follow the tone sequence to confirm response across the throttle range.
ESC Calibration Requirements
After choosing a calibration method, prepare the ESC and transmitter: connect the ESC securely to the motor and receiver, power on the transmitter, and set throttle stick and trim to neutral.
Before proceeding, verify these requirements:
- Use a fully charged battery; a low-voltage pack can interrupt setup or distort results.
- Confirm the transmitter’s throttle channel and endpoints are configured correctly; some ESCs expect roughly 1,000 to 2,000 μs PWM.
- Follow your ESC manufacturer’s calibration procedure and beep sequence; both can vary by model.
- Check whether calibration applies: digital DShot or CAN ESCs and DJI Opto ESCs generally don’t need it.
Once you’ve confirmed compatibility, keep your transmitter unchanged until the ESC’s sequence prompts you to move the throttle. This prevents a mismatched signal from undermining calibration.
Step 1: Remove Propellers First
Remove every propeller before connecting the battery or starting ESC calibration.
You should remove each propeller from the motor shaft. With the propellers removed, connect the battery only when you’re ready to calibrate, and keep hands, clothing, and loose objects clear of the motors. An ESC may arm or respond unexpectedly, and even a small throttle input can spin a motor.
Keep every propeller off throughout post-calibration throttle testing as well. On a drone, treat this step as essential: an unexpected motor start can cause serious injury. Don’t rely on the transmitter being at zero throttle to make a powered motor safe. After calibration and all motor checks are complete, disconnect the battery before reinstalling the propellers, and verify each propeller is firmly and correctly attached.
Step 2: Review Recommended ESC Settings
With the propellers still removed, review the ESC settings before testing the motors.
Set MOT_PWM_TYPE to match your ESC protocol—PWM, OneShot, or OneShot125—using both ESC and autopilot documentation. Set brake-on-stop to OFF, active braking or “Damped Light” to ON, and “Non-Damped” mode to OFF when available. Disable low-voltage protection, or choose a NiMH/NiCd battery setting, to reduce unexpected motor shutdowns. Start with Soft-Cut cutoff mode and a Low cutoff threshold; select Normal start mode and Medium timing.
Treat these as recommended starting settings, then verify compatibility with your ESC documentation. DJI Opto, DShot, and CAN ESCs don’t require calibration, but configure their other settings appropriately before operation. Confirm the selected protocol is supported by your hardware, and don’t assume defaults suit every installation. Keep the craft restrained and maintain the propeller-free condition throughout this settings review.
Step 3: Manual Esc-By-Esc Calibration
For a manual ESC-by-ESC calibration, remove the propellers, disconnect the flight controller’s USB cable, and power off the LiPo; then connect one ESC’s three-wire lead to the receiver’s throttle channel, usually channel 3, leaving the other ESCs disconnected.
Set your transmitter’s throttle to maximum, connect the LiPo, and wait for calibration tones, typically a musical tone followed by two beeps. Move the throttle to minimum. Cell-count beeps followed by a long tone usually confirm completion, but the sequence varies by ESC.
Disconnect the battery, then repeat these steps for each ESC. If calibration seems unsuccessful, reverse the transmitter’s throttle channel and try again. Follow the manufacturer’s documentation if its documented calibration sequence differs from these common tones. Keep the aircraft restrained during powered checks.
Step 4: Calibrate All ESCS Simultaneously
Most PWM ESCs can be calibrated together, but digital DShot/CAN and DJI Opto ESCs don’t require calibration. Remove all propellers, complete radio calibration, disconnect USB and the LiPo, and set your transmitter throttle to maximum. Connect the LiPo while holding full throttle. Wait for the red, blue, and yellow LEDs to cycle, then disconnect and reconnect the battery without lowering throttle.
If your autopilot has a safety switch, press it until the LED glows solid red. Listen for the musical tone, battery-cell-count beeps, and two beeps confirming maximum throttle capture. Move throttle to minimum and wait for the long completion tone.
Check motor response with propellers still removed. Set throttle to minimum, disconnect the battery, and skip calibration for DShot/CAN or DJI Opto ESCs.
Step 5: Semi-Automatic ESC Calibration
To use semi-automatic calibration, set `ESC_CALIBRATION` to `3` in your ground station. Remove all propellers, disconnect the LiPo battery and USB cable, then reconnect the battery to start the procedure. If your autopilot has a safety button, press and hold it until its LED turns solid red.
Listen carefully to the ESC tones as calibration proceeds. You should hear the arming tone, a musical tone, two beeps, and then beeps indicating the battery-cell count. A final long tone confirms that calibration has completed. Don’t disconnect power before you hear this confirmation.
If you don’t hear the expected sequence or calibration fails, disconnect power and repeat the procedure. Check the ESC-specific instructions and compare each beep with the documented sequence before trying again.
Step 6: Reconnect the Propeller Leads
Before reconnecting the propeller leads, disconnect the LiPo battery and keep the transmitter throttle at minimum.
With power isolated, reconnect each motor’s propeller leads to its matching ESC output. Seat each connector fully and secure it firmly; a loose connection can interrupt motor operation.
Route the leads away from shafts, gears, and other moving parts. Inspect the wiring before restoring battery power, and confirm no lead can snag during operation.
Keep the propellers removed during the first post-calibration motor test to reduce injury risk. Don’t install them until you’ve completed the test and confirmed the motor setup behaves as intended. If a motor’s direction or response seems incorrect, disconnect the battery before inspecting or changing its leads. Do not reconnect power until you’ve addressed the issue and checked the wiring before further operation.
Verify Throttle Endpoints
Verify Throttle Endpoints
Verify that your transmitter’s throttle range matches the ESC’s required endpoints using a radio calibration tool; a typical range is 1000 µs at minimum and 2000 µs at maximum. If your ESC requires these endpoints, set `MOT_PWM_MIN` to 1000 and `MOT_PWM_MAX` to 2000. After changing transmitter endpoint settings, recalibrate your radio so the flight controller records the throttle range.
Remove the propellers before testing. During ESC calibration, move the transmitter through its minimum and maximum positions and confirm the ESC recognizes limits according to the model-specific procedure. Then test each motor’s response, checking that all motors start at minimum and increase consistently as you raise throttle. Stop if any motor behaves differently, and recheck the endpoint settings and calibration before flight.
Diagnose ESC Startup Beeps
A continuous beep often means the ESC isn’t detecting a valid throttle signal. Turn on your transmitter, confirm the receiver and ESC connections, and hold the throttle stick at minimum. If beeping continues, lower throttle trim by about 50%, then restart with the stick at minimum.
| Sound | Action |
|---|---|
| Continuous beep | Check signal, connections, and minimum throttle. |
| Persistent beep | Reduce trim by about 50%; retry. |
| Musical tone, two beeps | Maximum throttle captured; lower stick. |
| Battery-cell beeps | Identify separately from calibration tones. |
Compare each sequence with your ESC’s manual; beep patterns vary by model, so don’t assume one code. During calibration, a musical tone followed by two beeps confirms maximum throttle capture.
Move the stick to minimum and wait for the completion tone. Distinguish battery-cell-count beeps from endpoint and completion tones; they can sound during calibration but indicate battery recognition, not a captured endpoint. If signals remain unclear, stop and consult the manufacturer’s instructions before repeating the sequence.
Inspect ESC Cooling Mounts
Inspect the ESC cooling mount for secure fit and unobstructed airflow. With power disconnected, gently move the mount. It shouldn’t shift or rattle. Check that its contact surface is clean and sits flat against the ESC heatsink or cooling plate; debris or gaps can reduce heat transfer.
Examine every screw, clip, and bracket for looseness, cracks, or corrosion. Tighten sound hardware, and replace any damaged parts before operation. Confirm the mount doesn’t cover cooling fins or restrict airflow around the ESC.
Check the full wire path to guarantee no lead is pinched between the mount and ESC. Also verify that the mount can’t touch exposed electrical terminals. Correct any clearance or routing problem before calibrating the ESC. A secure, unobstructed installation helps cooling remain effective during transmitter setup and later use.
Conclusion
Calibrate each ESC with the transmitter endpoints your flight controller will use. Remove propellers before powering the system, follow the ESC maker’s settings, and calibrate ESCs individually when required.
Reconnect propeller leads only after calibration, then verify throttle endpoints and confirm that every motor responds smoothly and stops at low throttle. Use startup beeps to diagnose signal or calibration issues, and inspect cooling mounts for secure airflow. Before flight, check that wiring is firm and ESCs remain cool.